Users
The Users page is designed to manage access to the SiteLock dashboard. It displays a detailed list of users with associated roles, email addresses, and names. Roles are restricted to account owner’s and regular viewers, ensuring controlled access. This page enables adding, editing, or removing user permissions as needed.

Users Table
The main content area features a table listing individual users with the following information.
| Field | Description | ||
|---|---|---|---|
Email Address |
The email addresses of the user. |
||
Username |
The user’s username. |
||
Name |
The full name of the user. |
||
Role |
Indicates the role of each user. |
||
My Profile |
Allows the user to view account owner’s profile. |
||
Manage |
Allows the user to:
|
| There can only be one account owner. All other users have viewer access. |
User Details
Update personal information, including name, email address, and username.
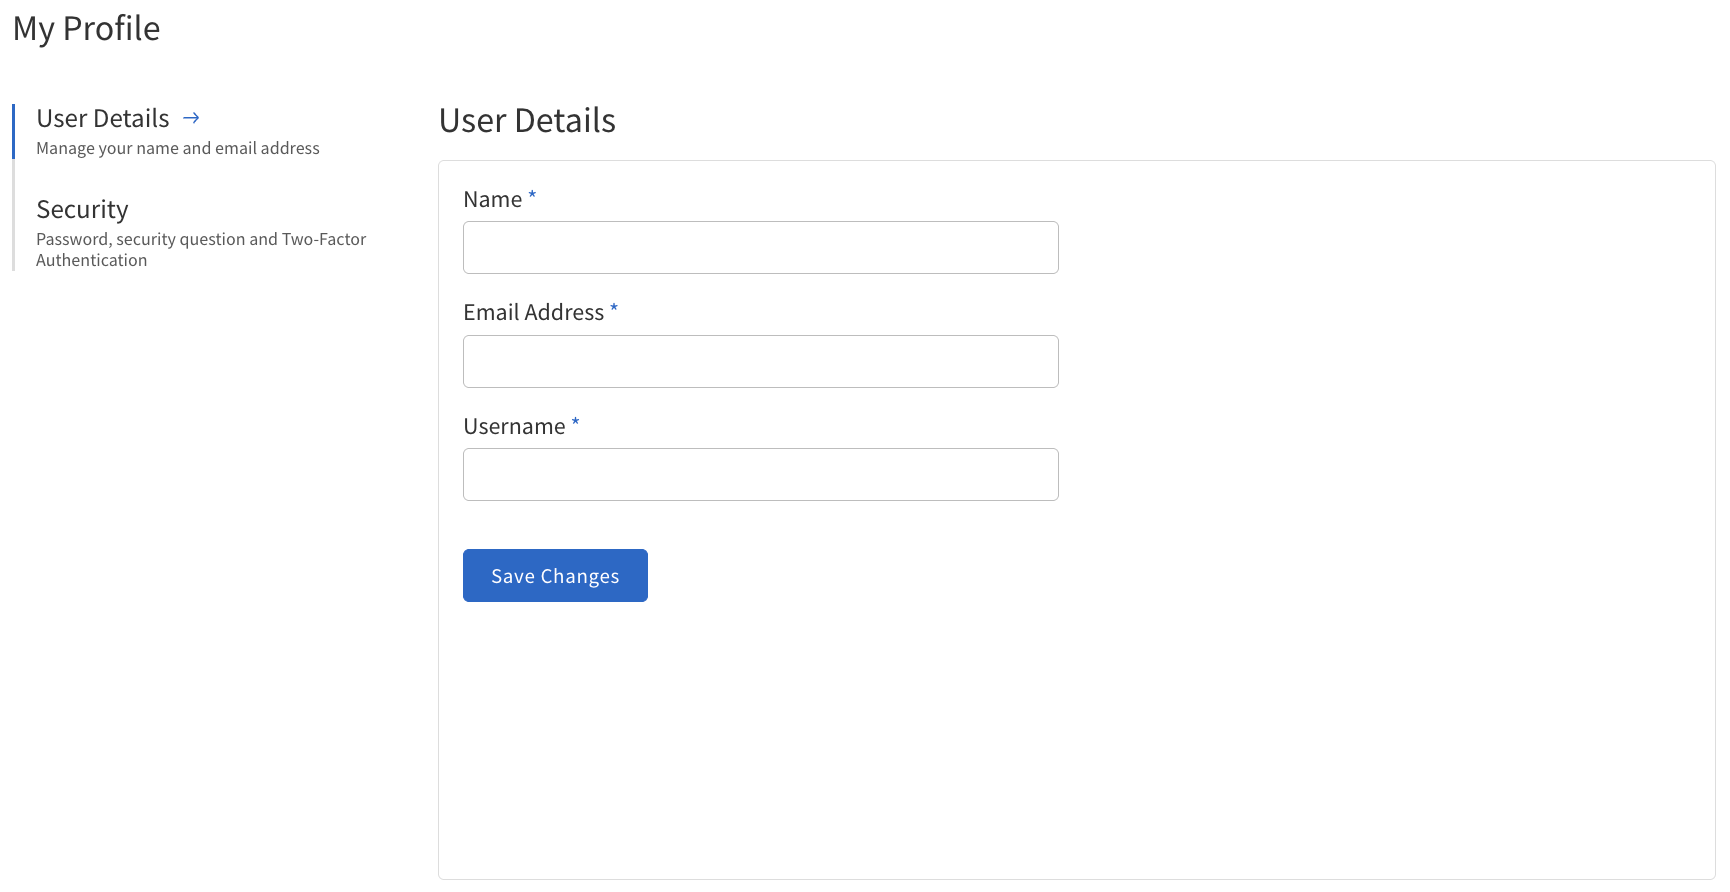
The following table describes the details of the User Details section.
| Field | Description | ||
|---|---|---|---|
Name |
The full name of the user. |
||
Email Address |
The email address associated with the user’s account. Example: [email protected]
|
||
Username |
The unique identifier used by the user to log in.
|
Security
Manage users' access to the account by updating their security questions, changing passwords and enabling two-factor authentication (2FA).
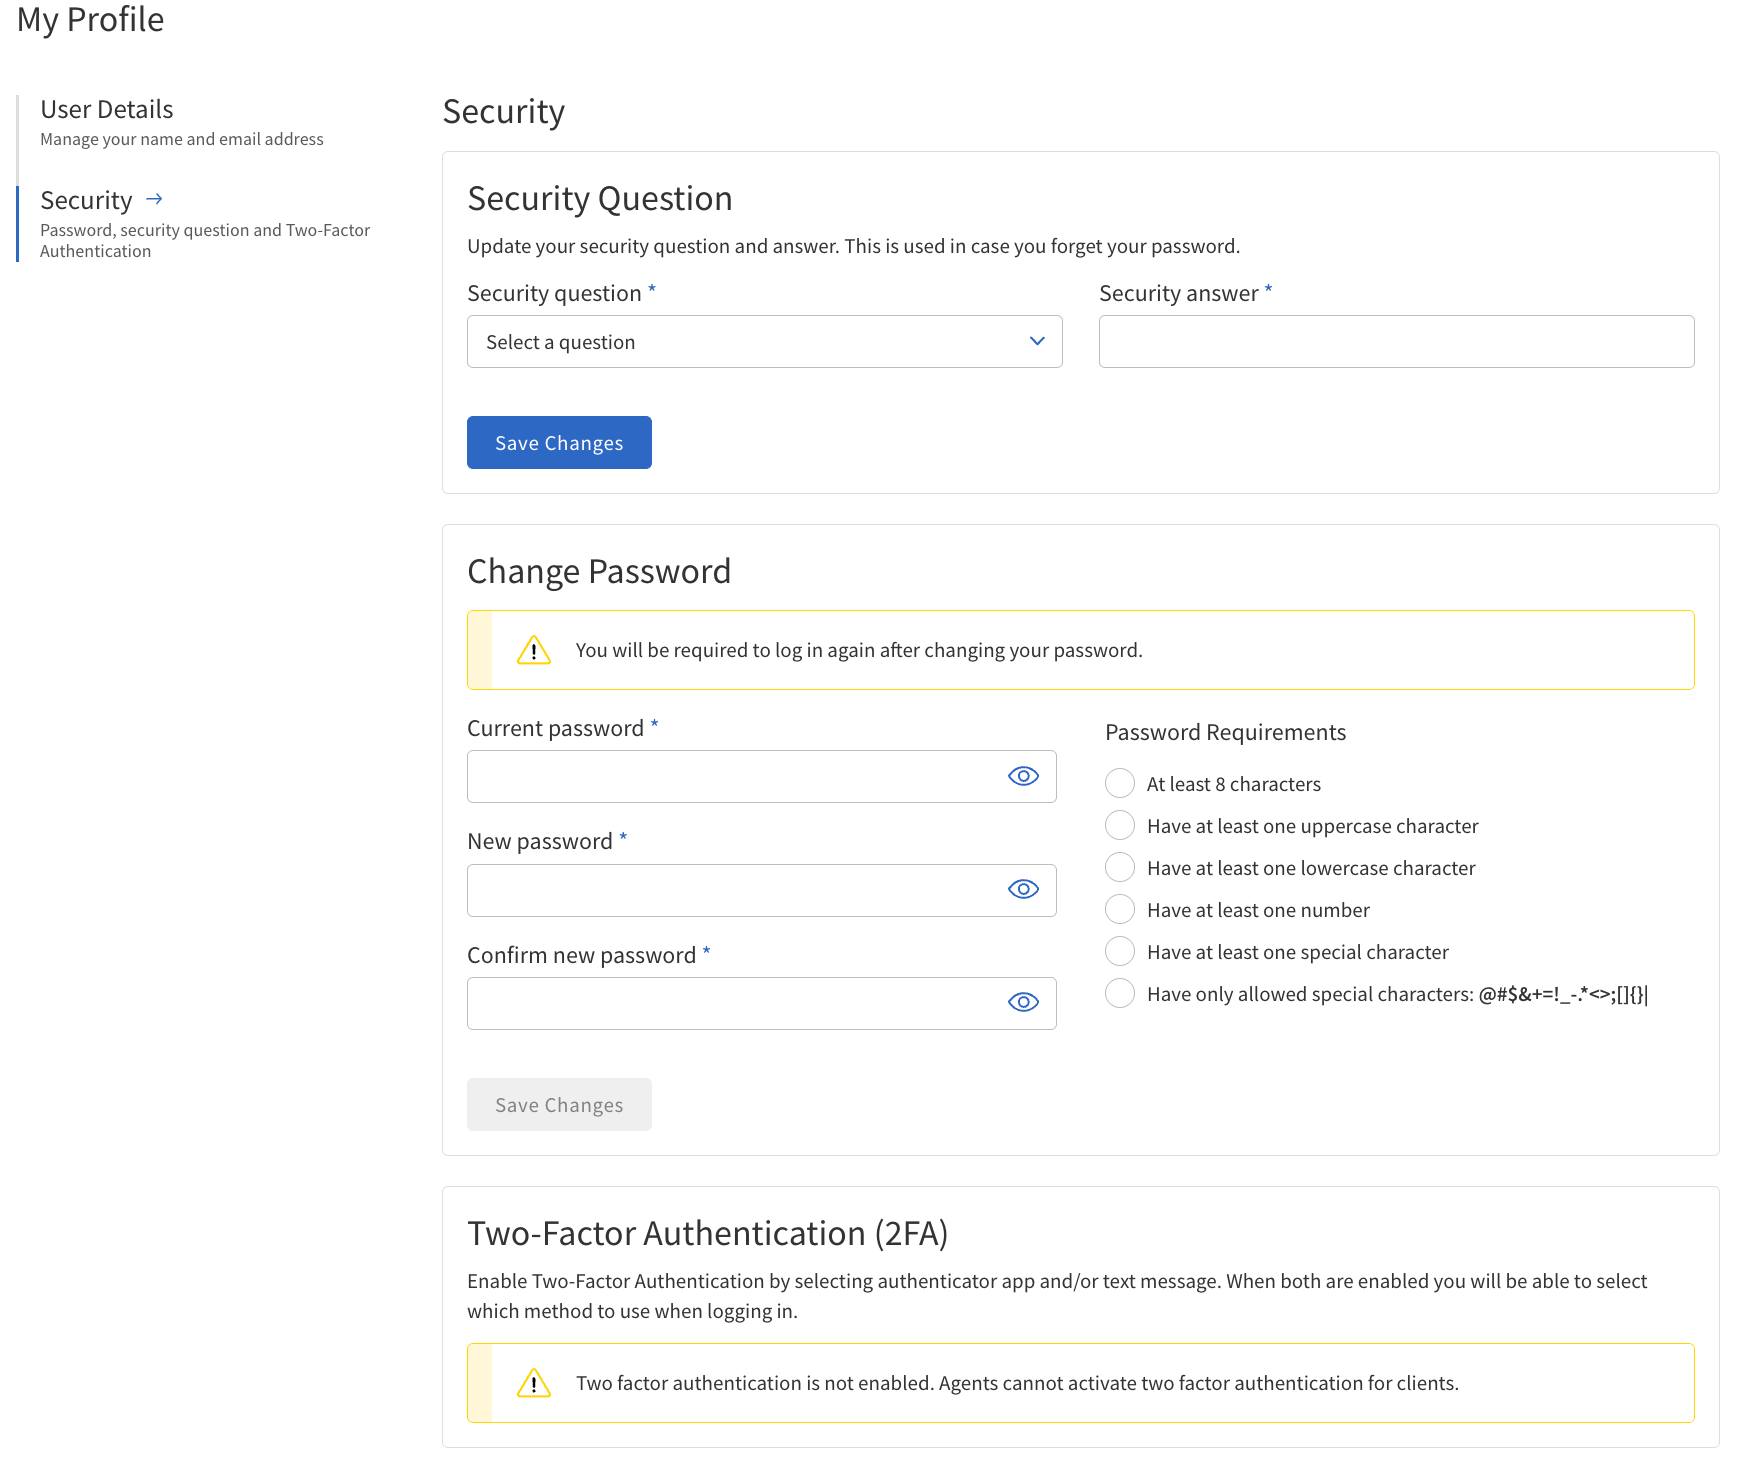
| Field | Description | Value | ||
|---|---|---|---|---|
Security Question |
Select a security question from the dropdown and provide an answer. This is used for interacting with SiteLock Support to verify the user’s identity. |
Questions:
|
||
Change Password |
Users are required to log in again after changing the password. |
Password Requirements:
|
||
Two-Factor Authentication (2FA) |
Enhance account security by enabling two-factor authentication (2FA). Both methods require verification of a code to successfully enable. |
Authenticator App 2FA:
SMS 2FA:
|
Step-by-step instructions
Adding a new user
-
Navigate to the Users page.
-
Click Add User.
-
Fill in the required fields: Name, Email Address, and Username.
-
Click Add User to submit.
-
The new user will receive an email invitation to set their password.
Editing a user
-
Locate the user you want to edit in the table on the Users page.
-
Click Manage next to their entry.
-
Select Edit User.
-
Update the user’s information as needed.
-
Click Save to apply changes.
Resetting a user’s password
-
Locate the user in the Users table.
-
Click the Manage button.
-
Select Reset Password.
-
Follow the prompts to reset the password.
Deleting a user
-
Find the user in the Users table.
-
Click the Manage button.
-
Select Delete.
-
Confirm the deletion when prompted.