Creating and managing certificate batches
The main task of organization administrators is to create and manage certificate batches. The Batches view displays a list of certificate batches ordered for the organization.
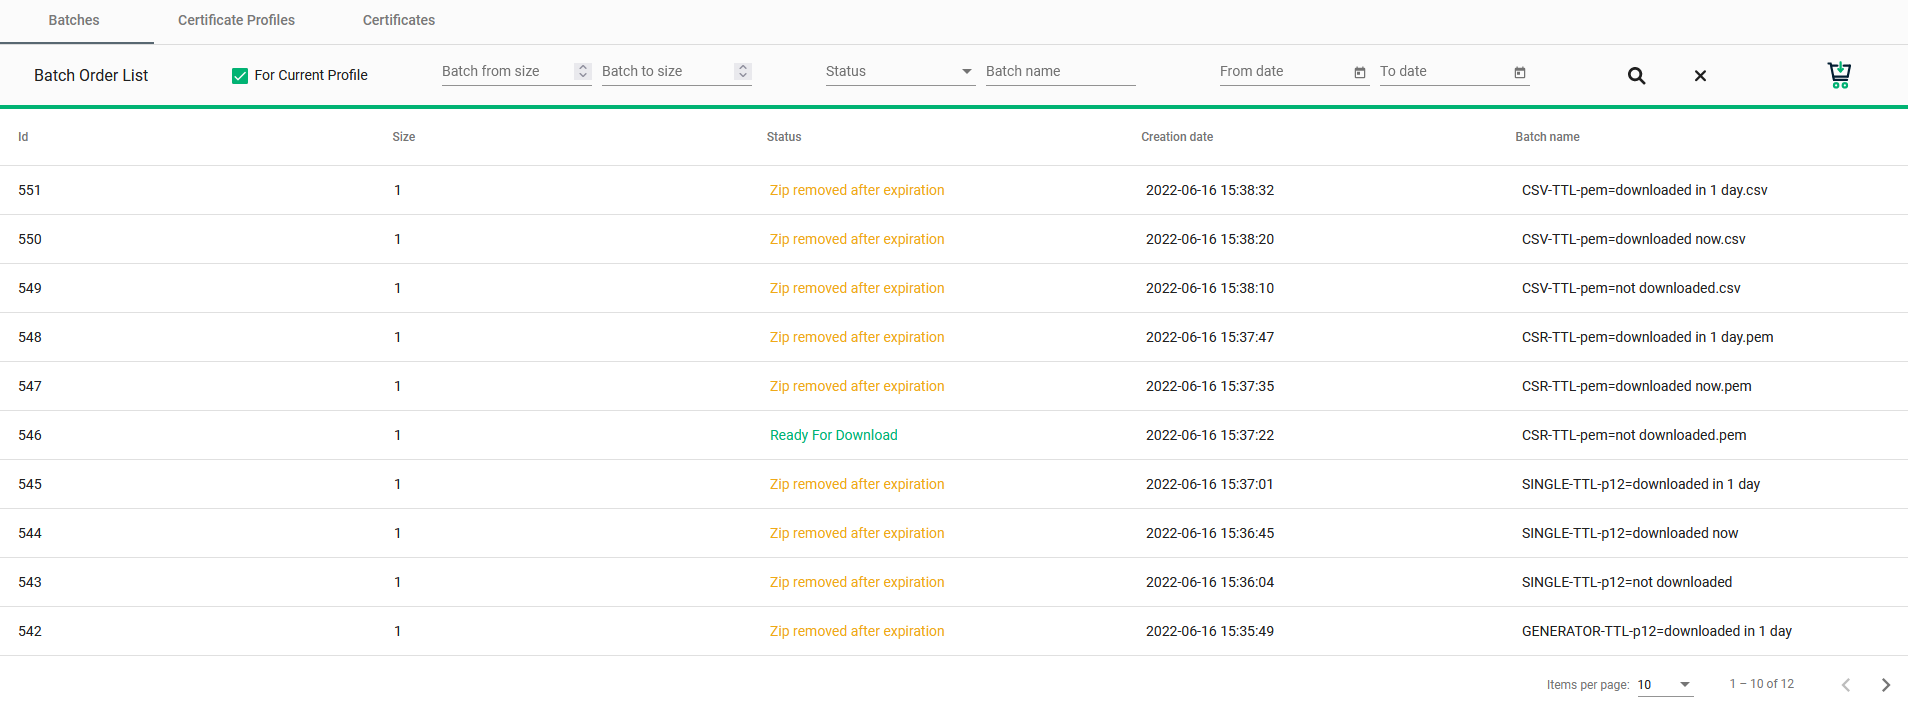
The batches table contains the following information:
-
The Id column shows the internal number automatically assigned to the batch by IoT Manager at the time of order.
-
The Size column indicates how many certificates are included in each batch.
-
The Status column shows what is currently happening with the batch order.
-
The Creation date column shows when the certificate batch was created.
-
The Batch name column shows a name assigned to a certificate batch.
You can view batches for the current profile by selecting For Current Profile
Batches can be filtered using the following fields:
-
The Status list: select to show batches only with a specific status:
-
Pending Creation
-
Pending Issue
-
Ready for Download
-
Zip removed after expiration
-
Processing Reject
-
Processing Revoke
-
Revocation Error
-
Rejected
-
Revoked
-
Aborted
-
Broken
-
Batch Issued Partly
-
-
The Batch name field: enter the name to show batches with a specific name. The filter can be set to accept either full or partial batch name. When partial batch name is set the batches which include this string in their names will be displayed.
-
The From date and To date fields: select dates to show batches for the specific time interval.
-
The Batch from size and Batch to size fields: enter sizes to show batches of only the specified sizes.
The filters' criteria are layered to produce the final search result. -
Clear Search Results removes all filters.
After creation, the batch status is Ready For Download, the Certificates Ordered and Certificates Issued values are increased, and the Available value is decreased.
Hovering over the batch name reveals a combination of icons: Audit Log, Download Batch, Reject Batch, and Revoke, depending on the batch status.
Create a batch
IoT Manager allows you to create batches in four ways: New CSRs ( Form ), New CSRs ( Single ), Upload CSRs, and Upload CSV. Details are provided in the following tabs.
-
Click the Add Batch icon in the upper-right corner of the Batch Order List page.
-
Complete the New Batch dialog using information provided in the following table.
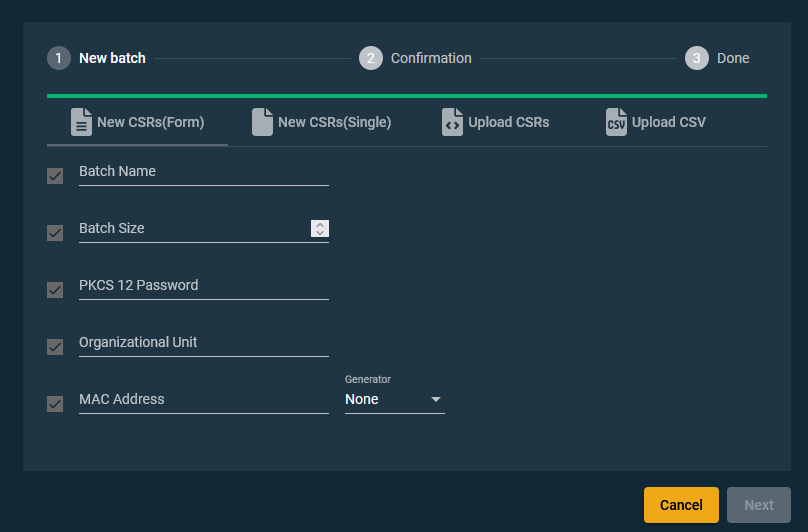
Field Description Batch Name
The certificate batch name
Batch Size
The number of certificates to be included in the batch
PKCS 12 Password
The password that is used to protect
.p12filesCommon Name
The name of the certificate
Organizational Unit
The name of the organizational unit
MAC Address
The user’s MAC address
Generator
The generator for creating common names for the certificates included in the batch. The availability of the generator depends on the currently selected certificate profile.
These are the basic settings for all profiles. Each profile can have additional parameters depending on the configuration. If the parameter is configured in Edit Organizations, it will be available to be selected here (see Edit organization parameters). -
Once the form is completed, click Next.
-
Review the batch details via the order confirmation.
Your new batch is added to the list of batch orders.
-
Click the Add Batch icon in the upper-right corner of the Batch Order List page.
-
Complete the New Batch dialog using the information provided in the following table.
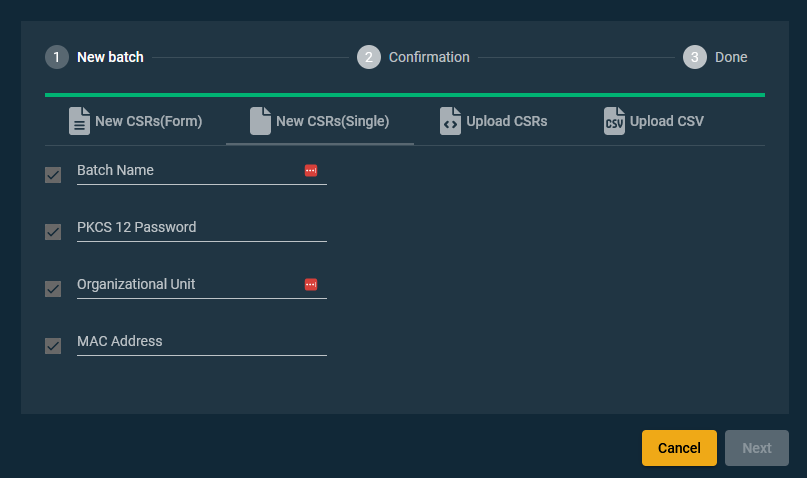
Field Description Batch Name
The certificate batch name
PKCS 12 Password
The password that is used to protect
.p12filesMAC Address
The user’s MAC address
These are the basic settings for all profiles. Each profile can have additional parameters depending on the configuration. If the parameter is configured in Edit Organizations, it will be available to be selected here (see Edit organization parameters). -
Once the form is completed, click Next.
-
Review the batch details via the order confirmation.
Your new batch is added to the list of batch orders.
-
Click the Add Batch icon in the upper-right corner of the Batch Order List page.
-
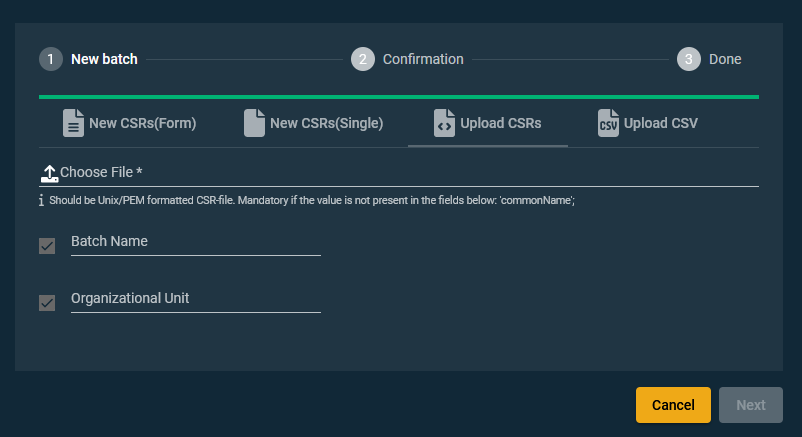
Upload a correctly-formatted CSR file and set the values based on the information provided in the following table. The uploaded file can be in different formats:
.csr,.txt,.pem, or a.zipfile containing one of these formats.The list of possible column names in the CSV file appears under the file selection input. Mandatory and optional fields are stated there. The fields vary depending on the profile configuration and can be viewed in the Certificate Profile Details. Field Description Batch Name
The certificate batch name
PKCS 12 Password
The password that is used to protect
.p12filesOrganizational Unit
THe name of the organizational unit
MAC Address
The user’s MAC address
-
Once the form is completed, click Next.
-
Review the batch details via the order confirmation.
Your new batch is added to the list of batch orders.
-
Click the Add Batch icon in the upper-right corner of the Batch Order List page.
-
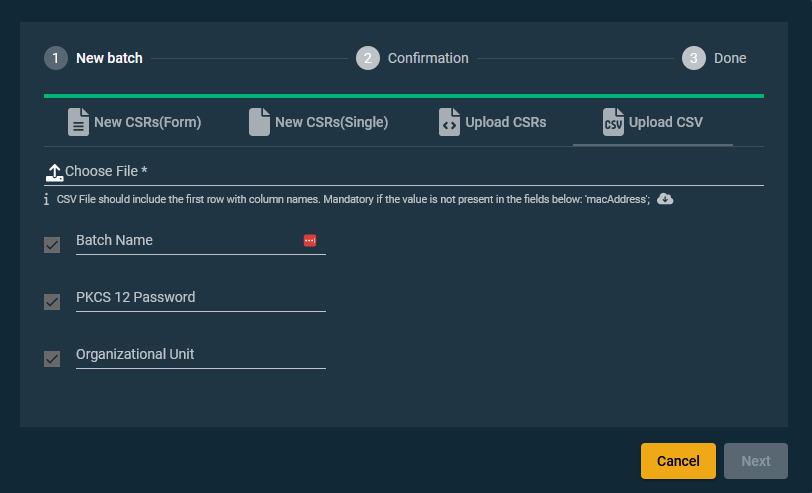
Upload a correctly-formatted, comma-separated values (CSV) file and set the values based on the information provided in the following table.
Field Description Batch Name
The certificate batch name
PKCS 12 Password
The password that is used to protect
.p12filesOrganizational Unit
The name of the organizational unit
-
Once the form is completed, click Next.
-
Review the batch details via the order confirmation.
Your new batch is added to the list of batch orders.
Downloading CSV templates
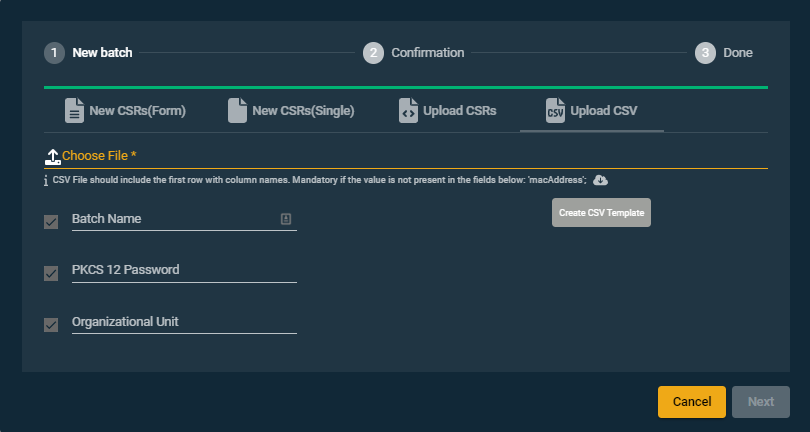
If you choose to upload CSV files, you can download an Excel template by clicking on the Cloud icon under the Choose File field.
The template will indicate which fields are mandatory.
Managing batches
Download batch
-
In the row for the batch, hover in the Batch name column.
You will see icons for Audit Log, Download Batch, and Reject Batch.
-
Click Download Batch.
-
The batch is provided as a ZIP file with the name of the batch ID. The certificates included in the batch are named based on the common name.
-
After the batch is downloaded the Reject icon is replaced by the Revoke icon.
-
Batch download can be done multiple times while status is Ready for download or Batch issued Partly.
-
The Download Batch icon is disabled when the batch status is any of the following: Zip removed after expiration, Broken, Rejected, or Revoked.
-
Reject batch
-
In the row for the batch, hover in the Batch name column.
You will see icons for Audit Log, Download Batch, and Reject Batch.
-
Click Reject Batch.
-
In the Reject Batch dialog, enter a reason for the rejection. Click OK.
-
The Reject button becomes invisible after rejecting a batch.
-
The Available Balance is increased by the number of ordered certificates.
-
The Certificates Ordered and Certificates Issued values stay unchanged.
-
Revoke batch
-
In the row for the batch, hover in the Batch name column.
You will see icons for Audit Log, Download Batch, and Revoke.
-
Click Revoke.
-
In the Revoke Batch dialog, enter a reason for the revocation. Click OK.
-
The Download button is disabled and the Revoke button becomes invisible after revocation.
-
The Certificates Ordered, Certificates Issued, and Available values stay unchanged.
-
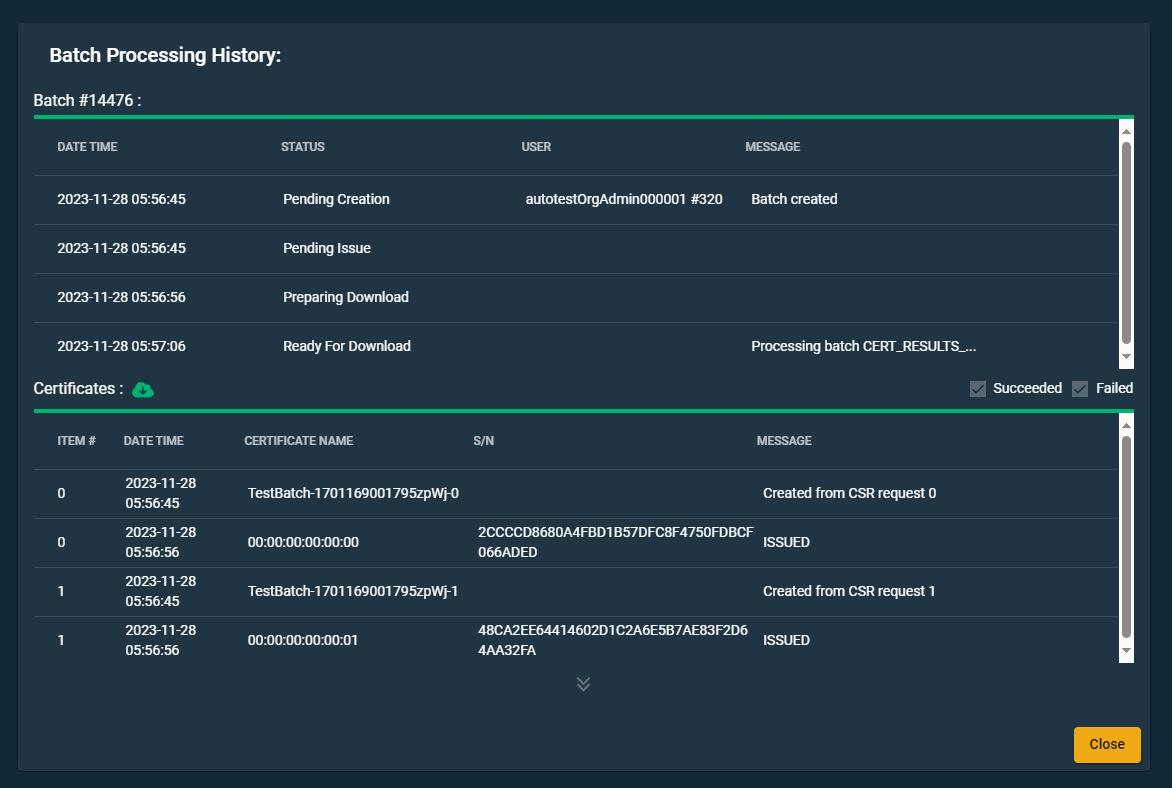
View batch processing history
-
In the row for the batch, hover in the Batch name column.
You will see icons for Audit Log, Download Batch, and Revoke or Reject Batch.
-
Click Audit Log.
You can filter certificates by Succeeded and Failed.
You can download Certificates Audit Log in CSV with the following details: Id, Date, Certificate Name, Serial Number, and Message.
