Installing the connector
This page describes how to install the Sectigo connector in Jira.
Install the connector
You should have received the connector from your account manager as a .zip file.
|
-
Ensure you have enabled plugin upload in Jira Data Center.
-
If you have not already, extract the contents of the
.zipfile.The connector app is a
.jarfile. -
Log in to Jira as an Administrator.
-
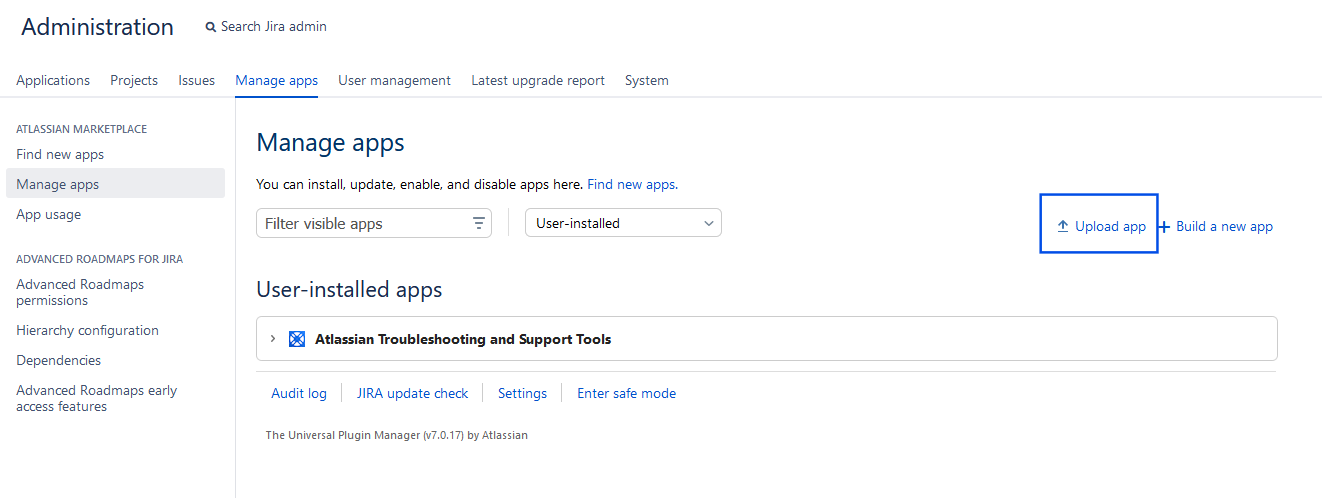
Navigate to Jira Administration, and select Manage Apps.
-
Under Atlassian Marketplace, click Manage Apps.
-
Click Upload App.

-
Browse to the location of the connector
.jarfile, click Open, and click Upload.
You should see the Sectigo Connector for Jira listed under User-installed apps.
Dependencies installation
During the installation of the Sectigo Connector for Jira, the following dependencies are created and configured automatically:
-
A default project named Certificate Management to manage certificates and revocations.
-
A Certificate issue type you can use to enroll, renew, and revoke certificates.
-
A Revoke Certificate issue type you can use to revoke certificates enrolled through other methods (not Jira).
-
The following custom fields are created:
-
Certificate Profile
-
Certificate Domain
-
Certificate CSR Text
-
Certificate ID
-
Revoke Reason
-
Revoke Reason Code
-
-
A new issue type scheme is generated, including the certificate and revocation issue types, and linked to the Certificate Management project.
-
The following workflows are imported, configured, and linked to their respective issue types and screen schemes.
-
The Certificate Management workflow is created for the certificate lifecycle.
-
The Revoke Certificate workflow is created for certificate revocations.
-