Configuring the connector
This page describes how to configure the connector to automate the certificate lifecycle management for Akamai.
Extract the contents
The following steps must be performed before running the script:
-
Extract the contents of the
sectigo-akamai-cm-<version>.ziparchive to the current path. -
Navigate to the root directory containing the solution files.
-
Give execute permission to the
certificate.shfile.chmod +x certificate.sh
Install the Akamai CLI
When you enroll a certificate, the certificate.sh script checks whether the Akamai CLI and needed tools are installed, and installs them automatically if not found.
|
If you decide to install the Akamai CLI and related tools manually, run the following commands. |
For more information about CPS CLI installation and usage, see cli-cps.
Authenticate with Akamai
After installing the Akamai CPS CLI and before executing the script, you must authenticate your requests using a valid .edgerc file that needs to be created in your home directory (~/.edgerc).
This file contains the secret, access_token, host, and client_token information for authentication through EdgeGrid.
To generate the credentials:
-
Log in to the Control Center.
-
Select your profile at top right, then select User settings on the Users tab.
-
Click Create API client, then click Quick or Advanced.
-
Copy and paste the values to the
.edgercfile into your home directory.
For more details, see Create authentication credentials in Akamai documentation.
Set the Akamai contract ID
Set your Akamai contract ID as an environment variable.
export CONTRACT_ID='<contract_id>'
source ~/.bash_profile
Validate the domains
-
Log in to SCM at
https://cert-manager.com/customer/<customer_uri>with the MRAO administrator credentials provided to your organization.Sectigo runs multiple instances of SCM. The main instance of SCM is accessible at
https://cert-manager.com. If your account is on a different instance, adjust the URL accordingly. -
(Optional) Navigate to the Organizations page to see if an organization with departments already exists. On this page you can create a new organization or add departments to an existing organization.
To add an organization:
-
Click Add.
-
Complete the fields with the organization’s details, then click Next.
-
Configure settings for specific types of certificates.
-
Click Save.
-
Select the newly created organization from the list of organizations.
-
Click Add Department and complete the fields with the department’s details.
-
Click Validate to start the validation process for this organization.
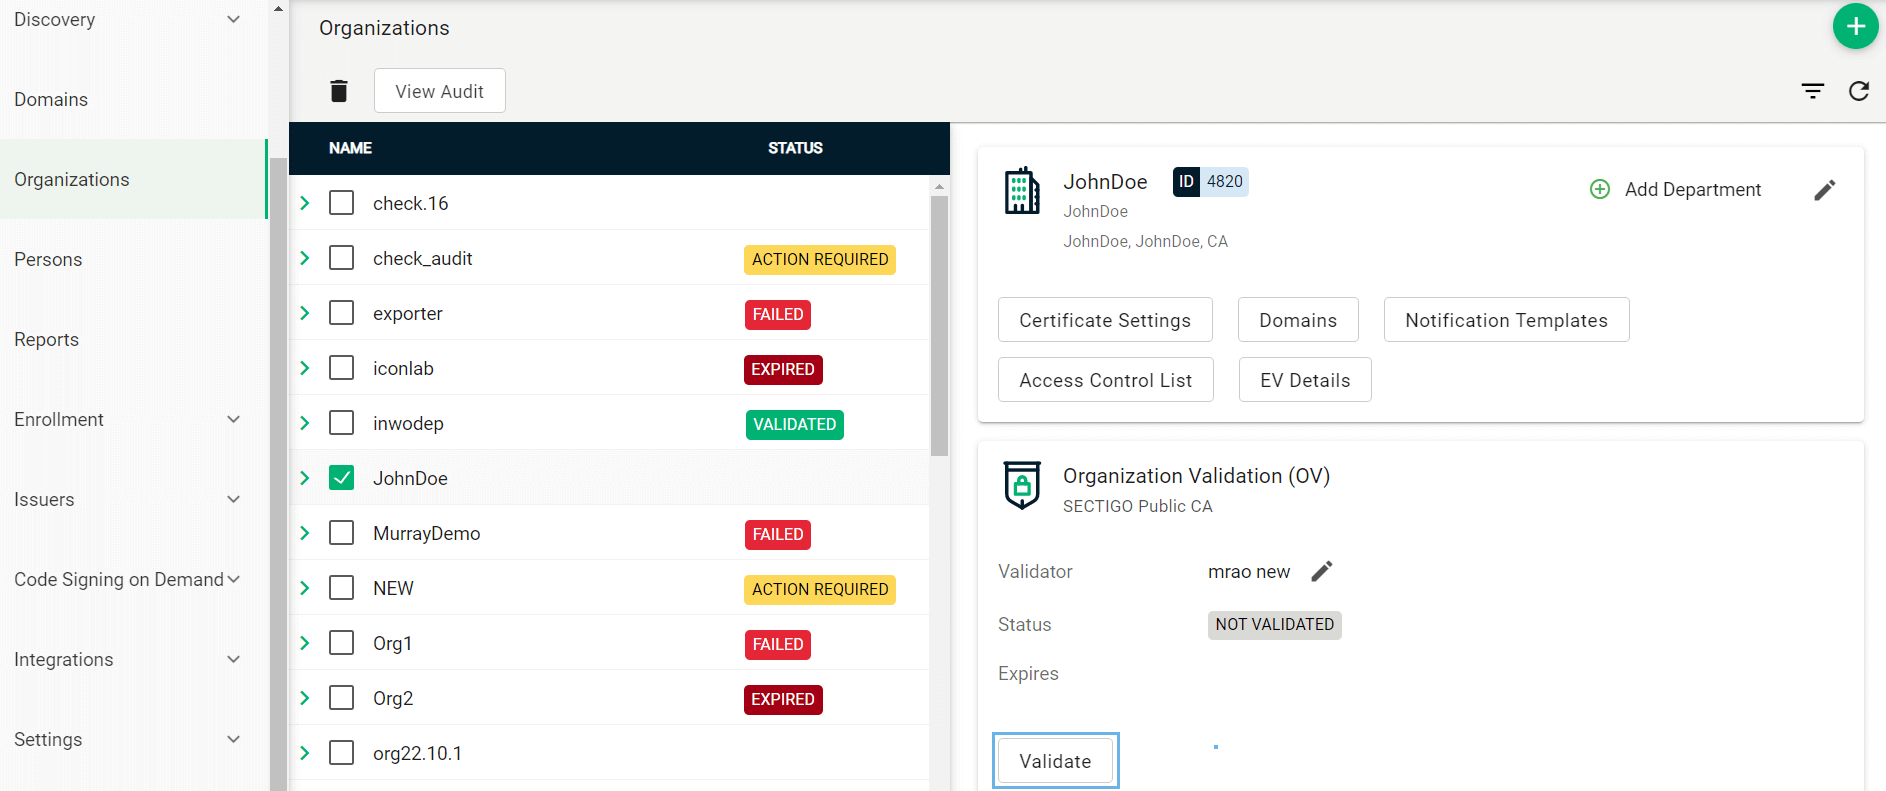
-
-
Navigate to the Domains page.

-
To create a new domain entry, click Add.
-
Specify the domain name, select the organizations/departments to delegate the domain to, and the allowed certificate types.
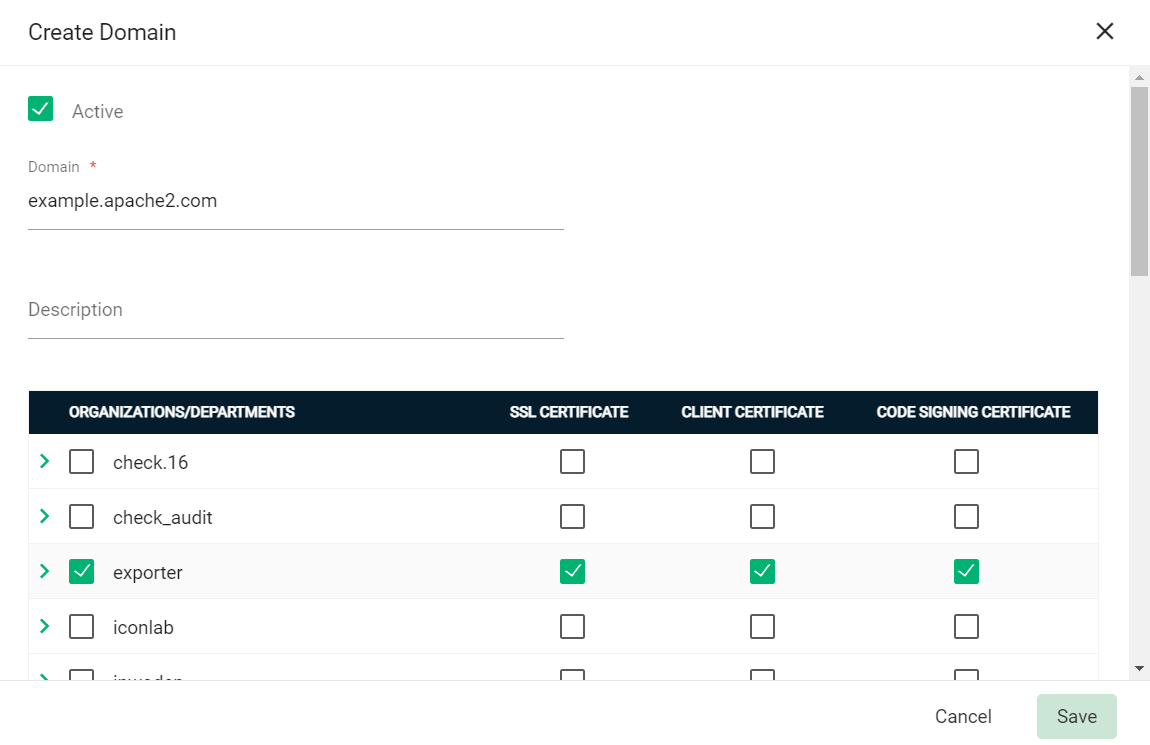
-
Click Save.
-
If your organization or department requires delegations to be approved:
-
Select the newly created domain from the list of domains.
-
Click Approve Delegations.

-
Select the organization or department, then click Approve.
To change the organization or department which the domain is delegated to, click Delegate and select the appropriate Organizations/Departments.
-
-
(Public CA only) Validate your domain:
For single-domain DV certificates, domains can be validated by using SCM or ACME challenge validation. All other types of certificates require domains to be validated in SCM. -
Select your domain and click Validate.

-
Select the appropriate DCV method as per your initial setup.
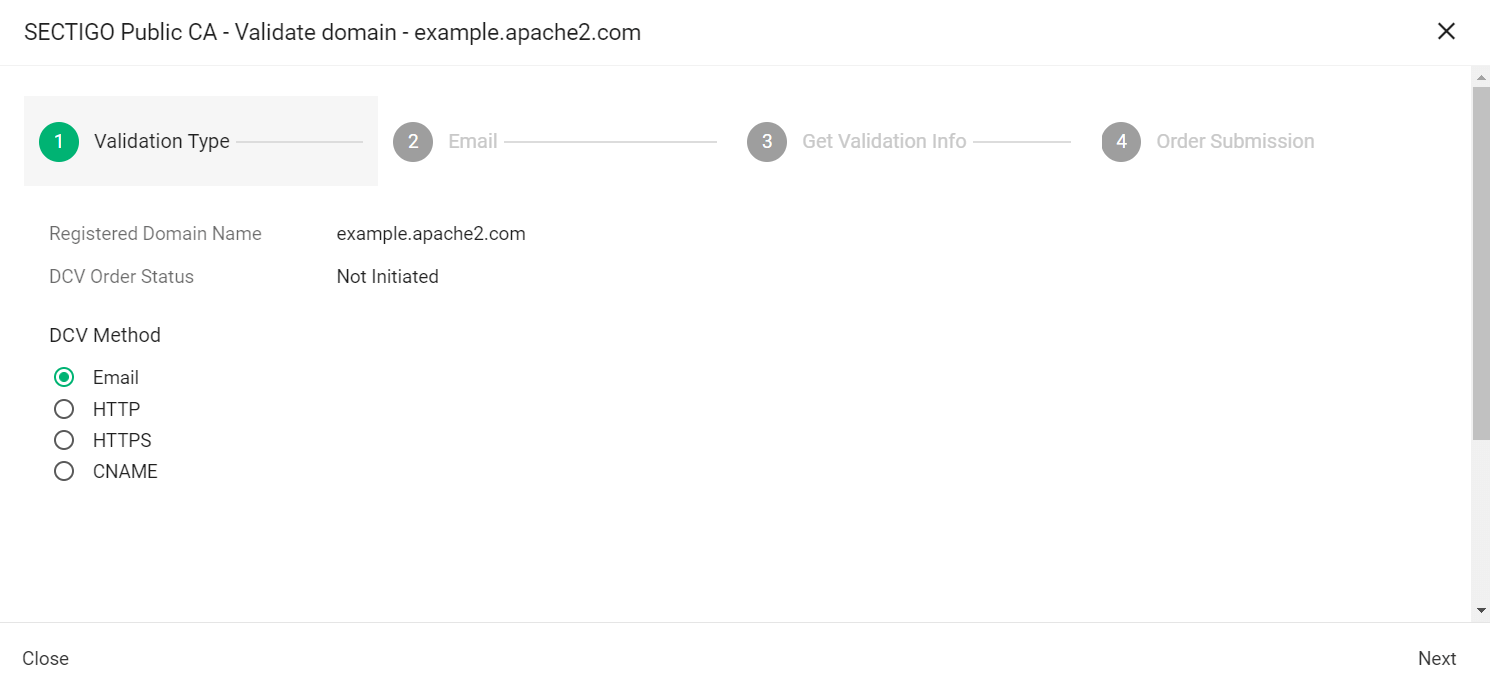
The following steps assume that you selected Email as the DCV method. -
Click Next.
-
In Select an email address, select a registered email.
-
Click Submit.
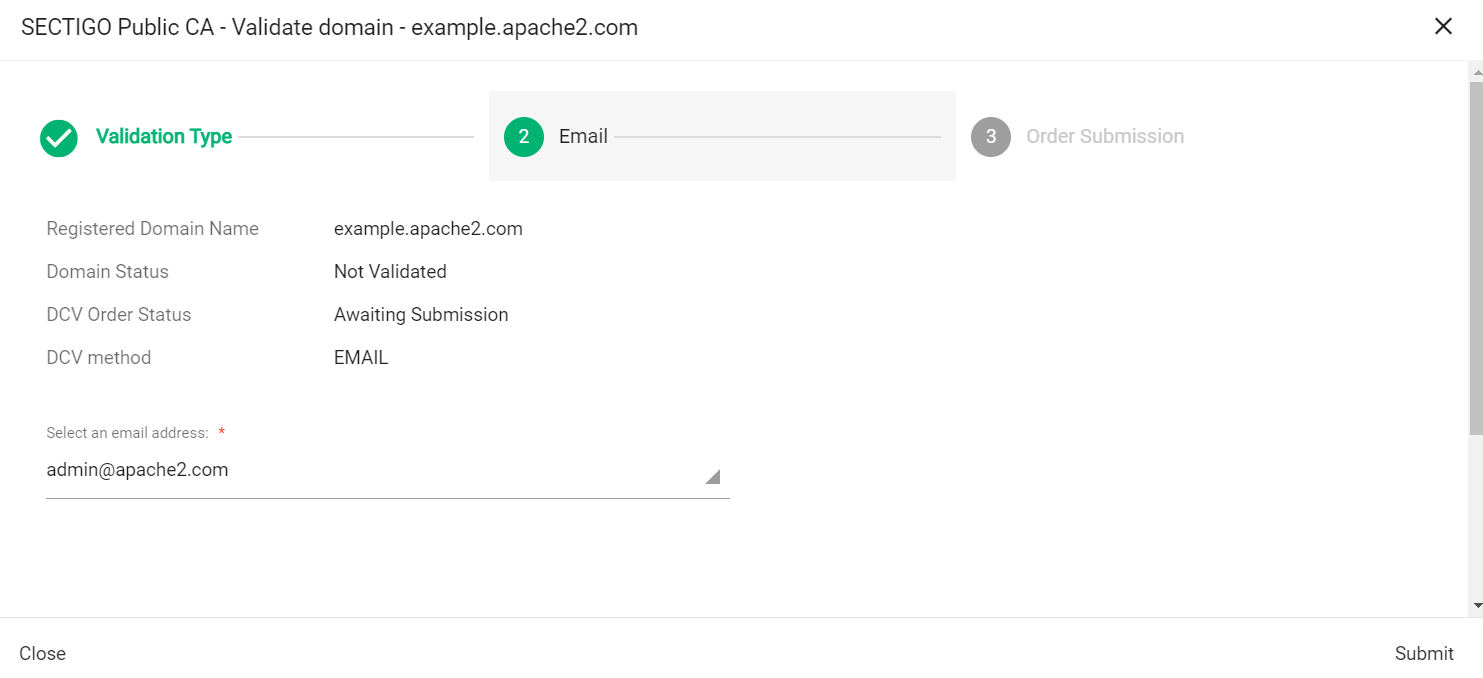
A message confirms that the validation letter was sent to your selected email.
-
Click OK.
-
Follow the instructions provided in the email to validate your domain.
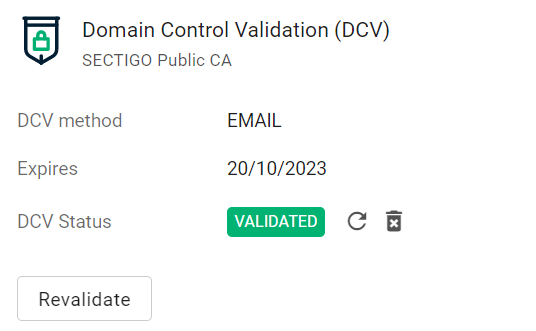
Once the domain is validated, its Status will change to Validated on the Domains page.
-
Obtain the SCM API credentials
-
Log in to SCM at
https://cert-manager.com/customer/<customer_uri>with the MRAO administrator credentials provided to your organization.Sectigo runs multiple instances of SCM. The main instance of SCM is accessible at
https://cert-manager.com. If your account is on a different instance, adjust the URL accordingly. -
Select . Make a note of the URL value under SSL Certificates REST API. You will need to assign it to the
scm_urlparameter in theconfig.yamlfile.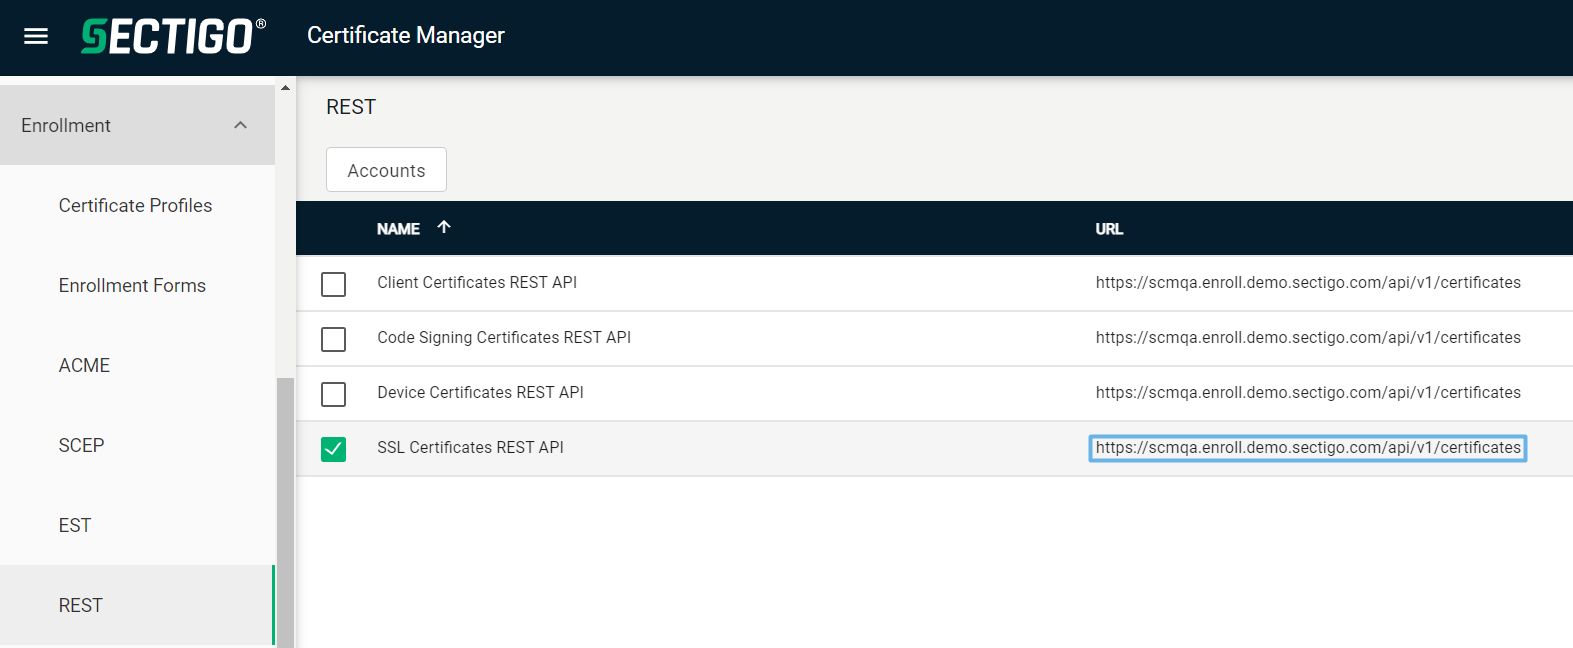
-
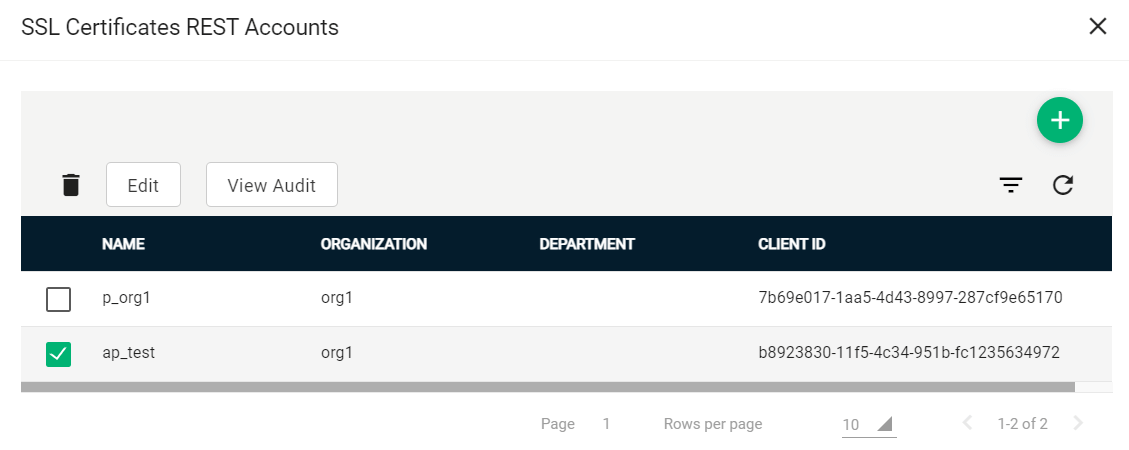
Select SSL Certificates REST API and click Accounts.
-
Select your account and click Edit.
-
Click Reset Secret and confirm resetting the client secret.
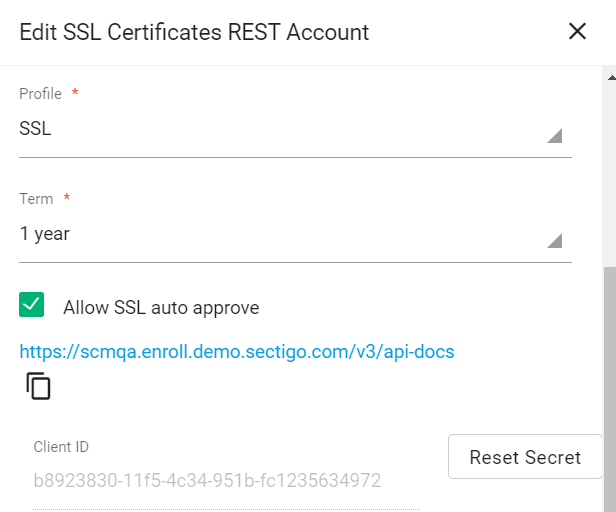
Make a note of the values under Client ID and Application (client) Secret. You will need to assign them to the
client_idandclient_secretparameters in theconfig.yamlfile.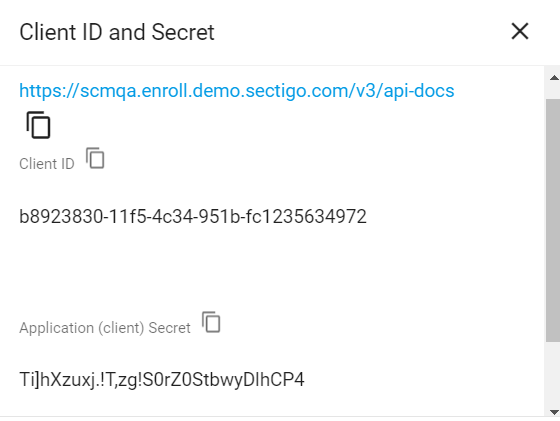
Set up the config file
Configure the config.yaml file.
client_id: "e9a4a344-eafd-471d-a9cb-496835ffcb76"
client_secret: "e9a4a344-eafd-471d-a9cb-496835ffcb76"
scm_url: https://scmqa.enroll.demo.sectigo.com/api/v1
expiry_window: 30
renew_revoked_certificate: true
The following table describes parameters in the file.
| Parameter | Description |
|---|---|
|
The client ID of the SCM user |
|
The client secret of the SCM user |
|
The URL of the SCM account |
|
The number of days prior to expiration that a certificate renewal process is initiated.
The default expiry window is |
|
Specifies whether to renew revoked certificates.
The possible values are |
Set up the certificate profile file
Configure the example.com file in the ./domains/options directory.
You can create copies of the sample file for different certificate profiles.
domain_name: "example.com"
cert_type: ecc
secureNetwork: standard-tls
geography: core
techContact_email: [email protected]
techContact_firstName: John
techContact_lastName: Doe
techContact_phone: "+994515373029"
adminContact_email: [email protected]
adminContact_firstName: John
adminContact_lastName: Doe
adminContact_phone: "+12505550199"
org_addressLineOne: 401 COUNTY ROAD 2
org_city: Ottawa
org_country: CA
org_name: JohnDoe
org_phone: "+12505550199"
org_postalCode: K1A 0C4
org_region: ON
csr_c: CA
csr_o: DoePrivateCA
csr_st: Ontario
csr_sans:
 - blog.example.com
 - mail.example.com
The following table describes the parameters in the file.
| Parameter | Description |
|---|---|
|
The domain name included in the certificate Common Name (CN) field |
|
The type of secure network where you want to deploy the certificate.
The possible values are |
|
The key algorithm to use for certificate enrollment.
The possible values are |
|
Specifies the region where you want to deploy the certificate.
You can include China and Russia if your Akamai contract specifies your ability to do so and you have approval from the Chinese and Russian government.
The default value is The possible values are:
|
|
The email address of the Akamai administrator who you want to use as a contact at your company |
|
The first name of the Akamai administrator who you want to use within Akamai |
|
The last name of the Akamai administrator who you want to use within Akamai |
|
The email or a comma-separated list of emails of the certificate requester |
|
The first name of the certificate administrator who you want to use as a contact at your company |
|
The last name of the certificate administrator who you want to use as a contact at your company |
|
The phone number of the certificate requester |
|
The address of your organization |
|
The locality name included in the certificate Locality (L) field |
|
The country where your organization resides |
|
The name of your organization |
|
The phone number of your organization |
|
The postal code of your organization |
|
The region of your organization, typically a state or province |
|
The country name included in the certificate Country (C) field |
|
The organization name included in the certificate Organization (O) field |
|
The state or province name included in the certificate State (ST) field |
|
A comma-separated list of subject alternative names (SAN) included in the certificate subjectAltName field |