Configuring the connector
This page describes how to configure the connector for log retrieval. There are two methods available, either manual setup within the Azure Portal, or an automated process using Terraform.
Using either method, the following Azure resources are deployed:
-
Resource group
-
Log Analytics workspace
-
Custom table in Log Analytics workspace
-
Data Collection Endpoint
-
Data Collection Rule
-
Storage account
-
Service plan
-
Function App on Linux Consumption Plan
-
Role Assignment
-
Application Insights
Configuring the connector requires the following:
-
Obtain the SCM Audit API credentials.
-
Choose one of the following options:
-
Configure the connector using Terraform.
-
Configure the connector using Azure Portal.
-
Obtain the SCM Audit API credentials
-
Log in to SCM at
https://cert-manager.com/customer/<customer_uri>with the MRAO administrator credentials provided to your organization.Sectigo runs multiple instances of SCM. The main instance of SCM is accessible at
https://cert-manager.com. If your account is on a different instance, adjust the URL accordingly. -
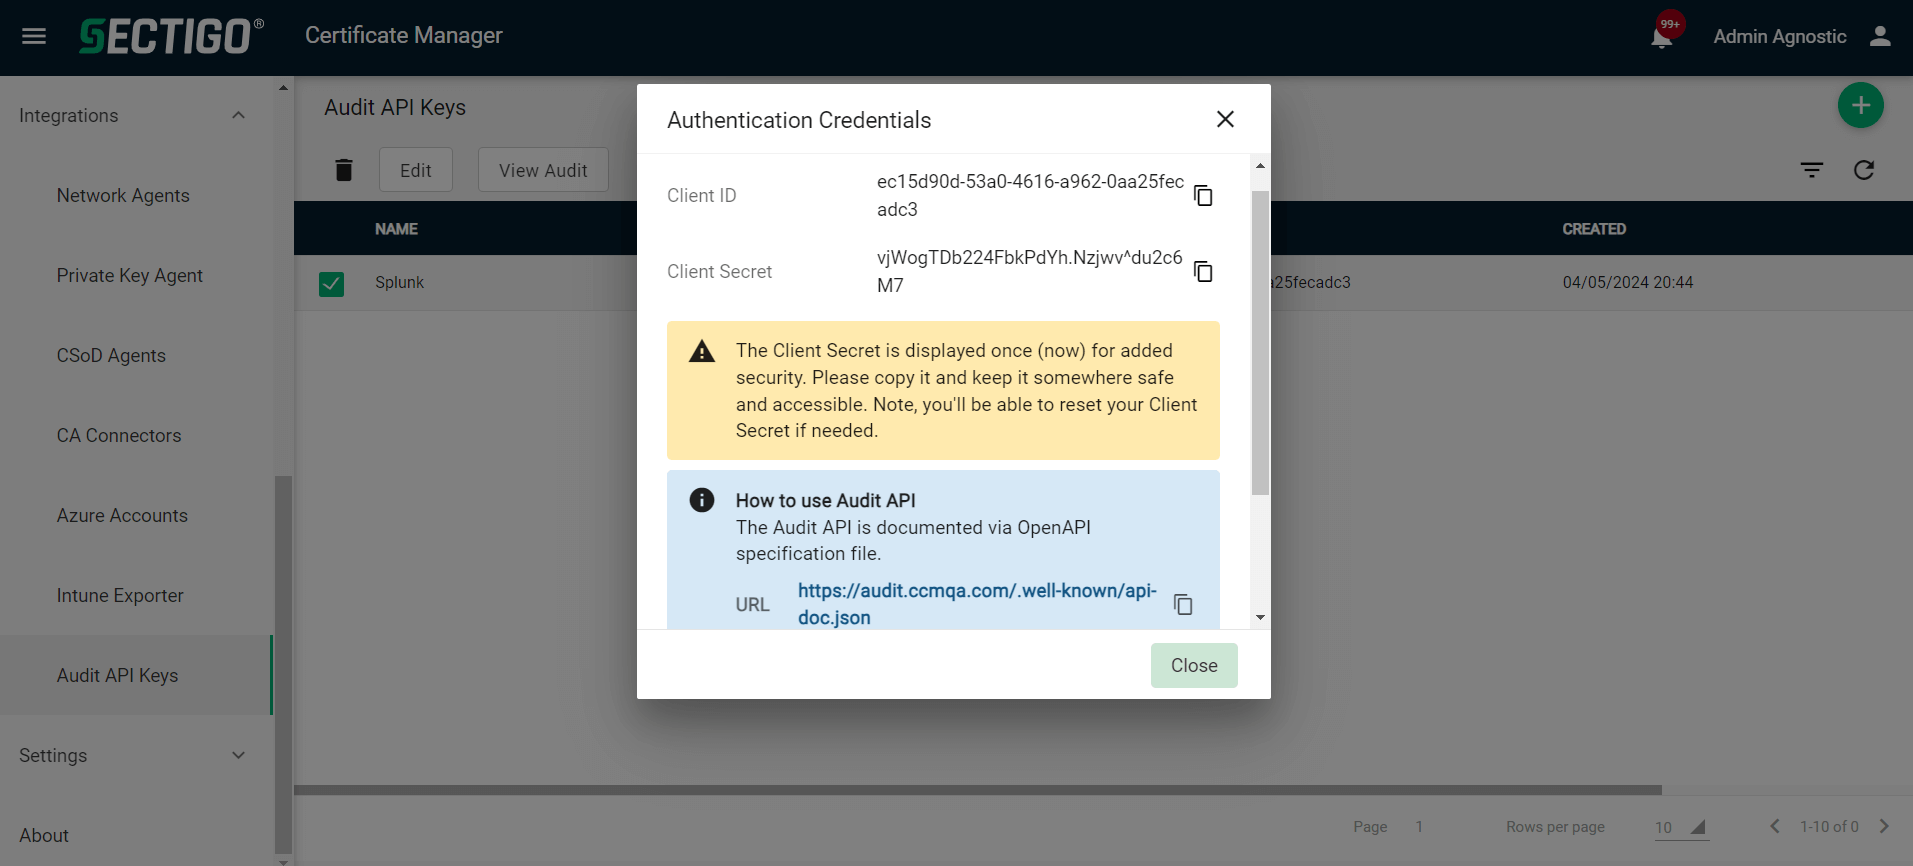
Select .
-
Click Add to create an Audit API client.
-
Give a name to your client, then click Save.
-
Make a note of the URL, Client ID, and Client Secret values.
You will need them during the data input configuration in Azure.
Configure the connector
Once you have obtained the SCM Audit API credentials, proceed with one of the following options:
Configure the connector using Terraform
You will receive a zip file from Sectigo containing two Terraform folders. You can choose to do either of the following.
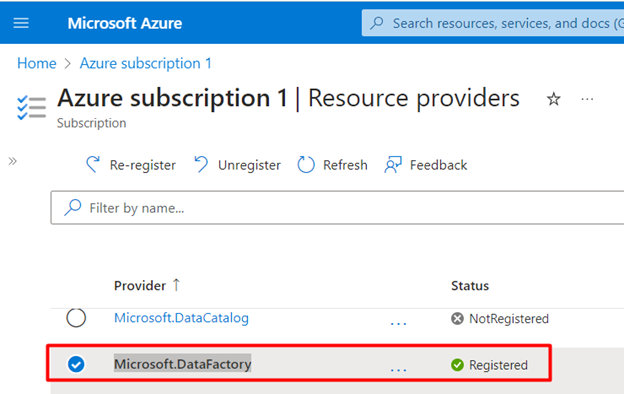
If terraform is not working properly, check that the Microsoft.DataFactory provider is registered.
|
Create all Azure resources from scratch
Create all Azure resources with Terraform and upload a zip package to the Functional app.
-
Install terraform on your OS.
For Ubuntu installation instructions, see Install Terraform. -
Go to the
create_all_resourcesfolder inside the package. -
Complete the
terraform.tfvarsfile with your values.
-
In the
create_all_resourcesfolder, run the following commands:-
terraform init -
terraform plan -
terraform apply
-
Create Azure resources inside an existing resource group
Create Azure resources with Terraform inside an existing resource group and upload the zip package to the Functional app.
-
Install terraform on your OS.
For Ubuntu installation instructions, see Install Terraform. -
Go to the
existing_workspacefolder inside the package. -
Complete the
terraform.tfvarsfile with your values.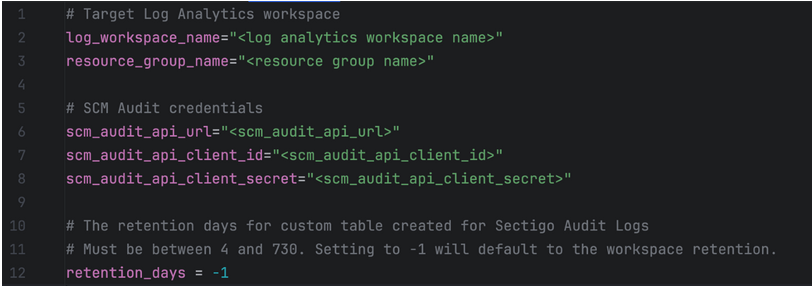
-
In the
existing_workspacefolder, run the following commands:-
terraform init -
terraform plan -
terraform apply
-
Configure the connector using Azure Portal
| For more information about Azure Monitor Logs, see Send data to Azure Monitor Logs with Logs ingestion API (Azure portal). |
Create data collection endpoint
A data collection endpoint (DCE) is needed to accept the data from external sources. It provides a URL where audit logs will be ingested.
-
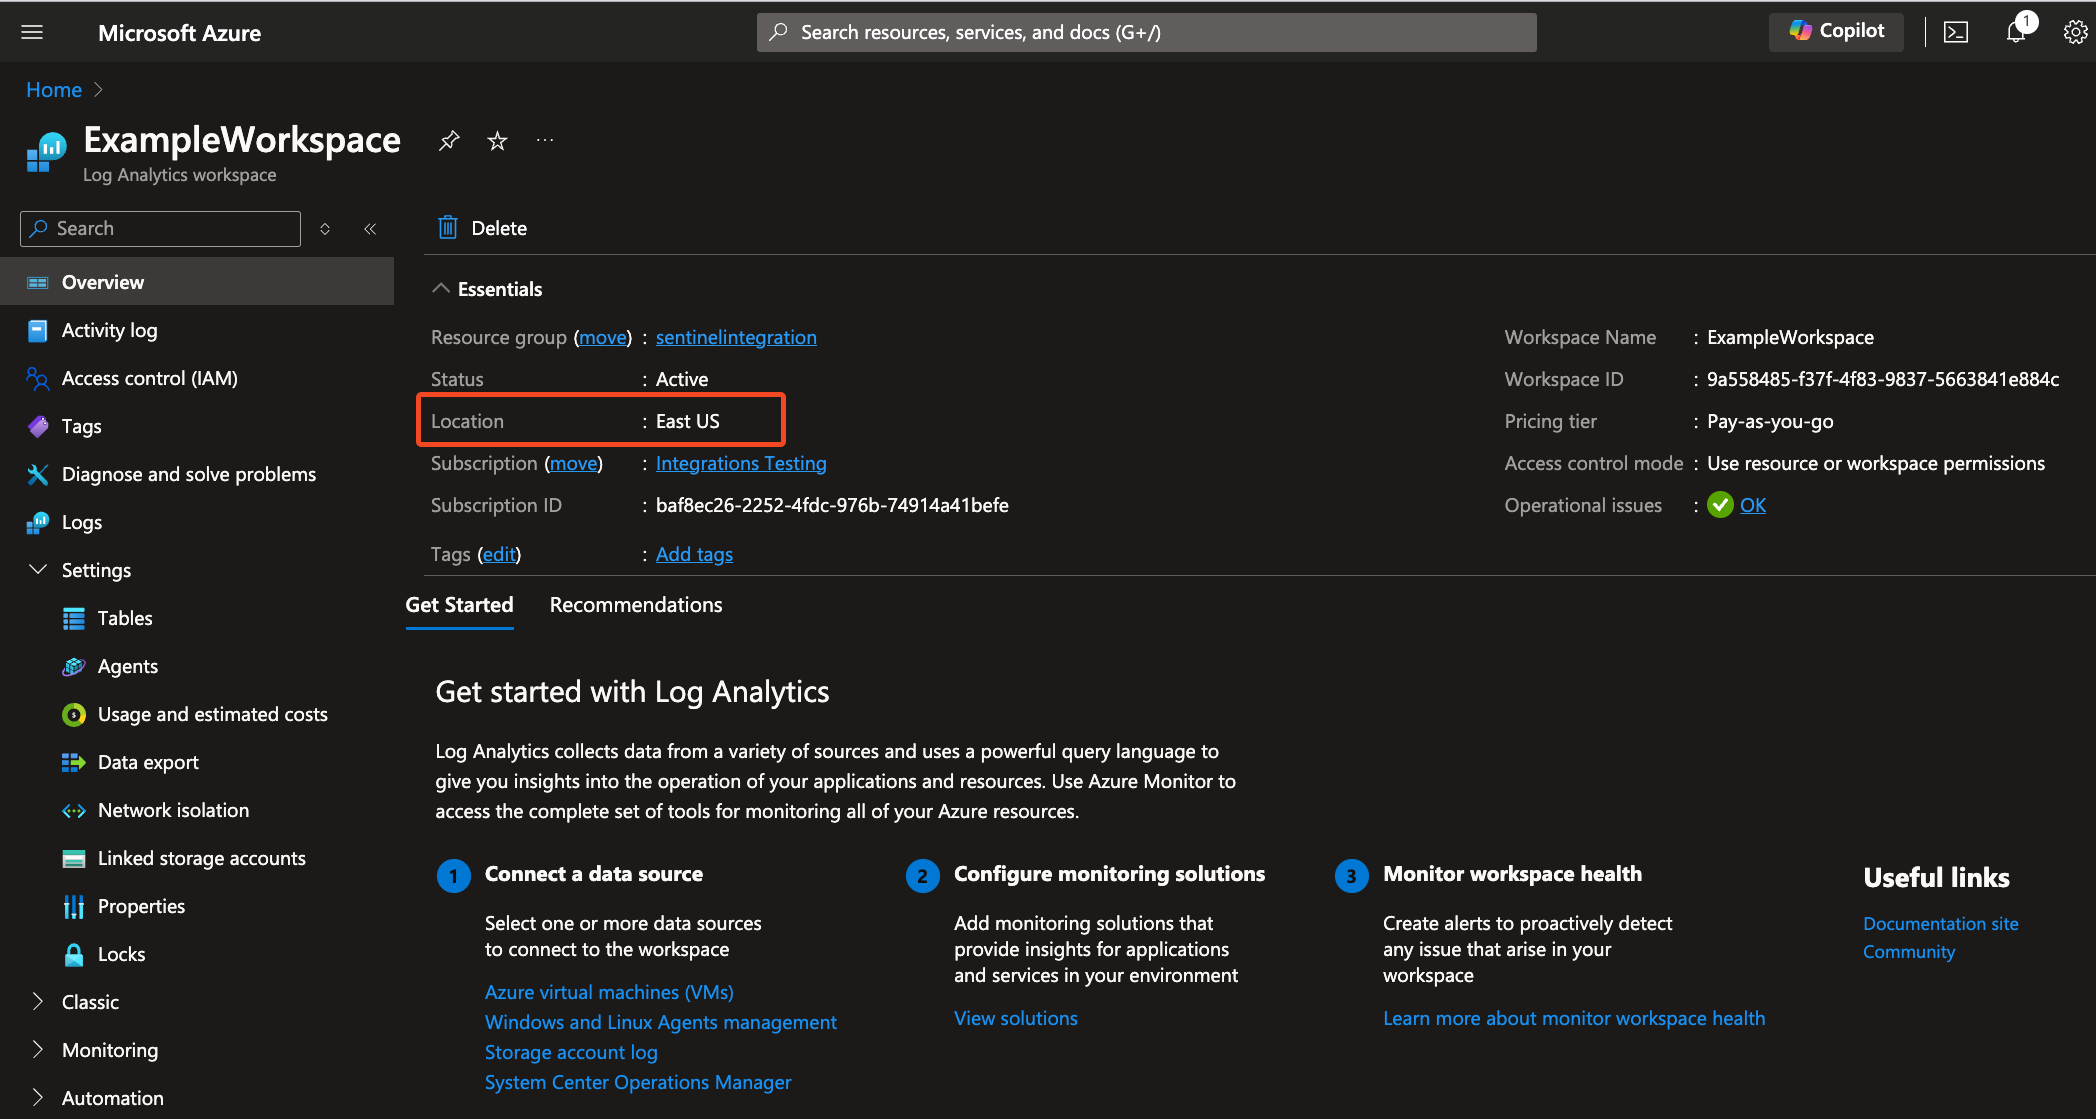
In the Microsoft Azure Portal, go to the Log Analytics workspace where you want to ingest Sectigo audit logs and note its location.
-
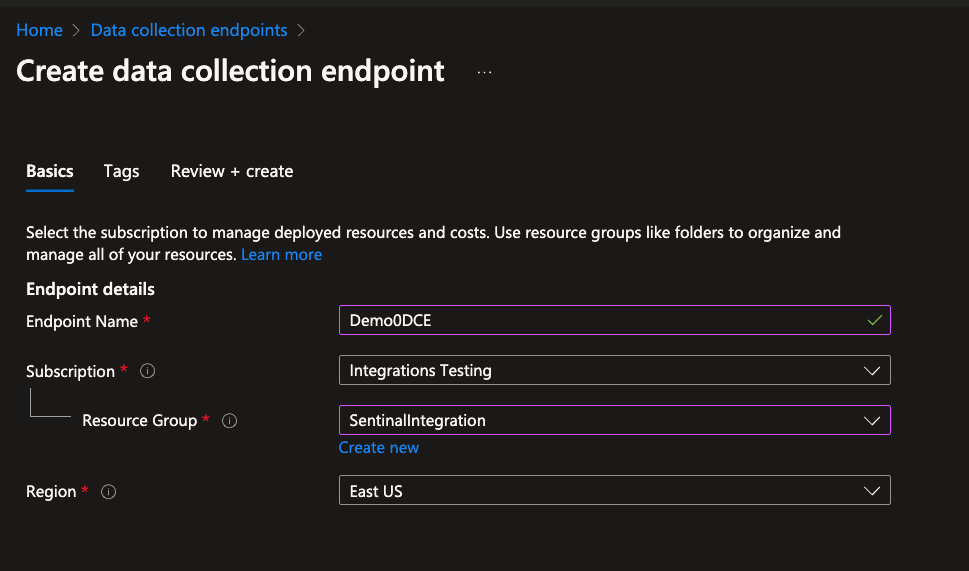
In the Monitor menu, select Data collection endpoints, and then select Create.
-
Provide an Endpoint Name, and select the Subscription and Resource Group.
Ensure the Region is the same as the region for your workspace.
-
(Optional) Apply Tags to the endpoint.
-
Click Review + create.
-
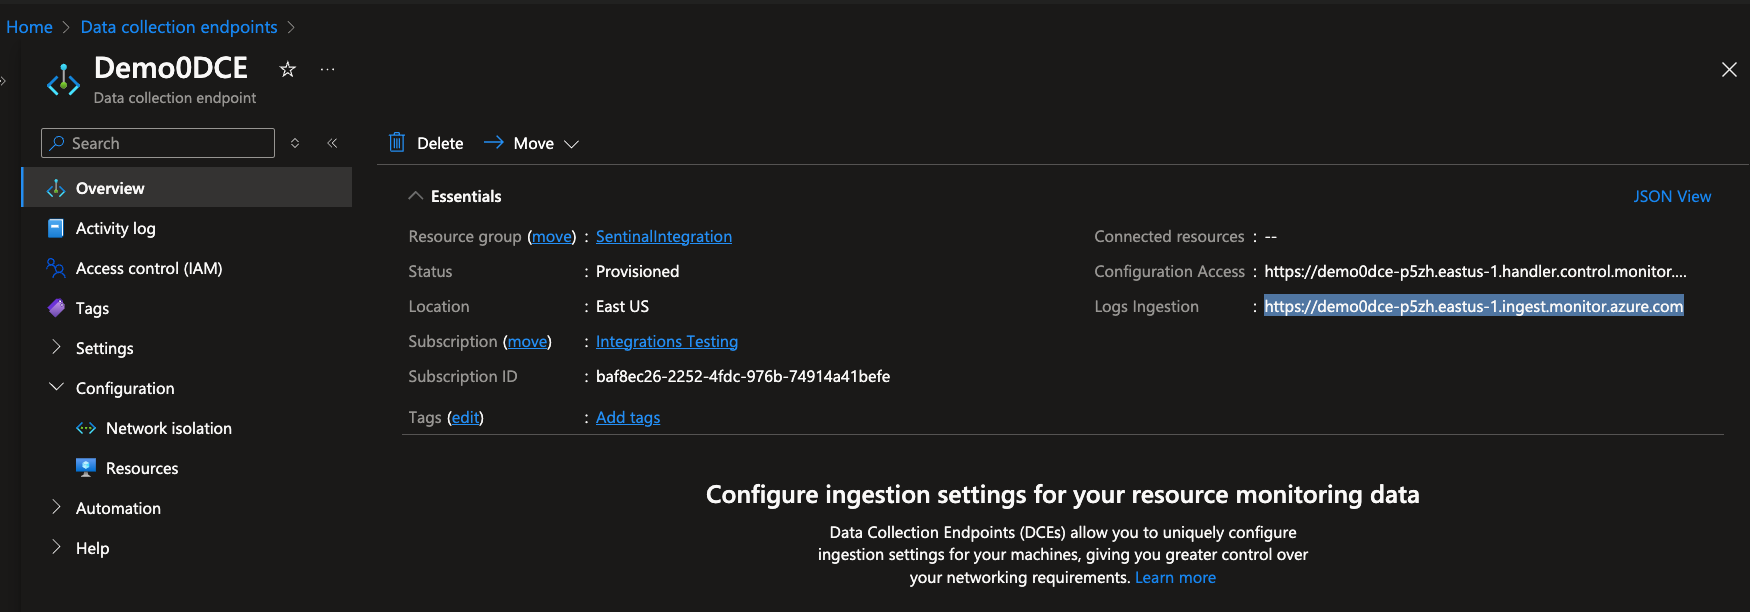
In Data collection endpoints, select your new endpoint, and click Overview.
-
Make note of the Logs Ingestion URL for later use.
Create a table in Logs Analytics workspace
-
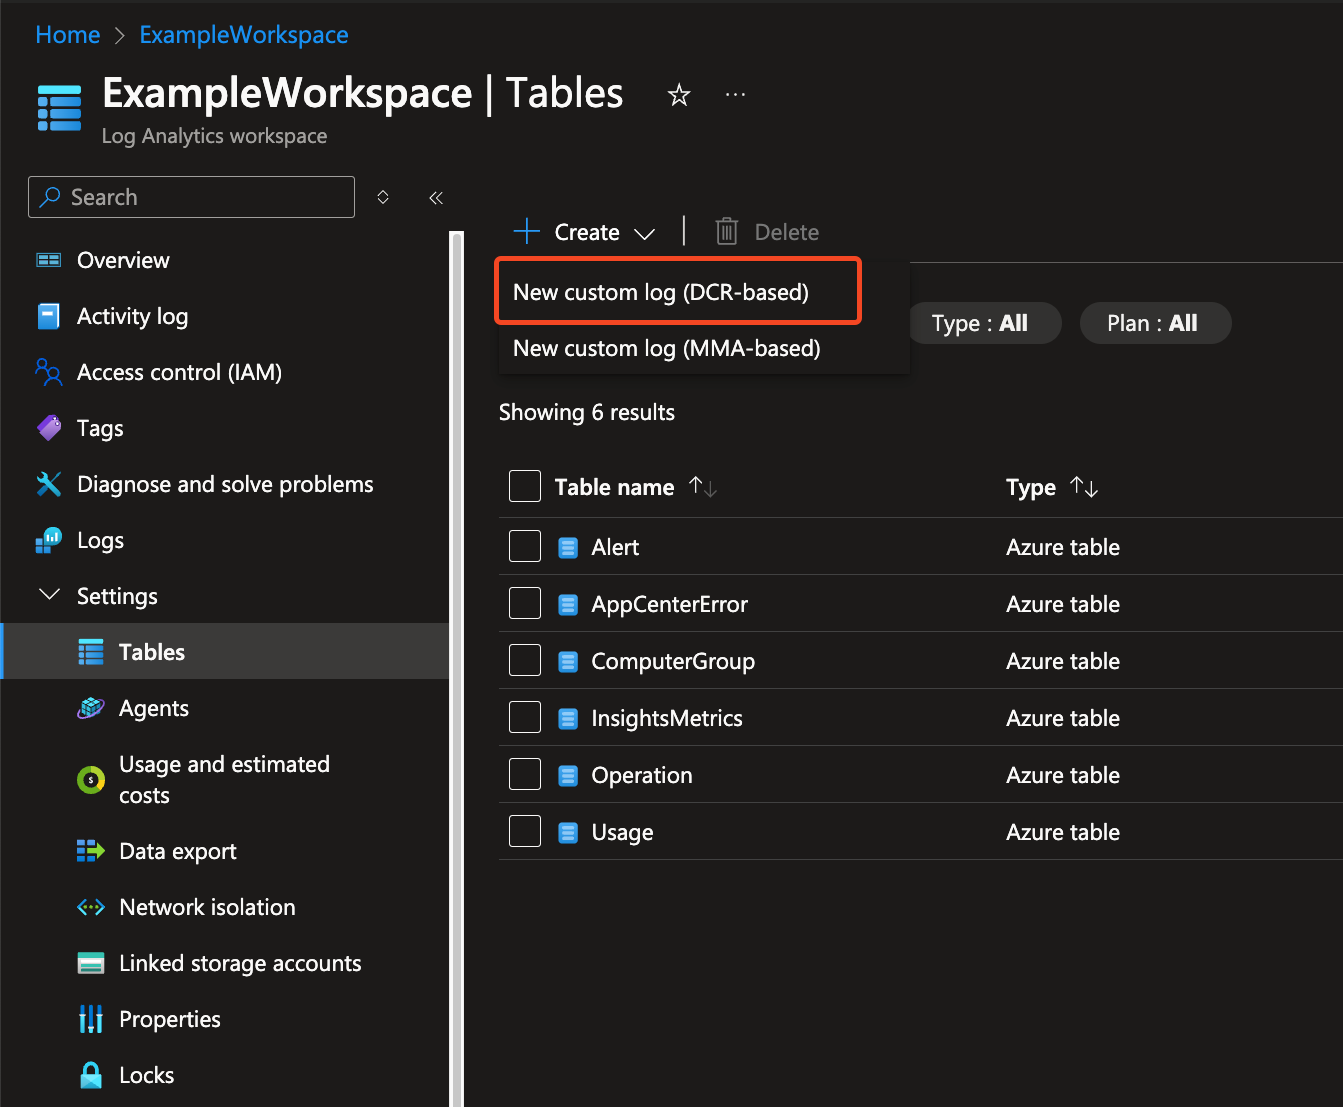
In the Logs Analytics workspace, select Settings > Tables.
-
Select Create > New custom log (DCR based).
-
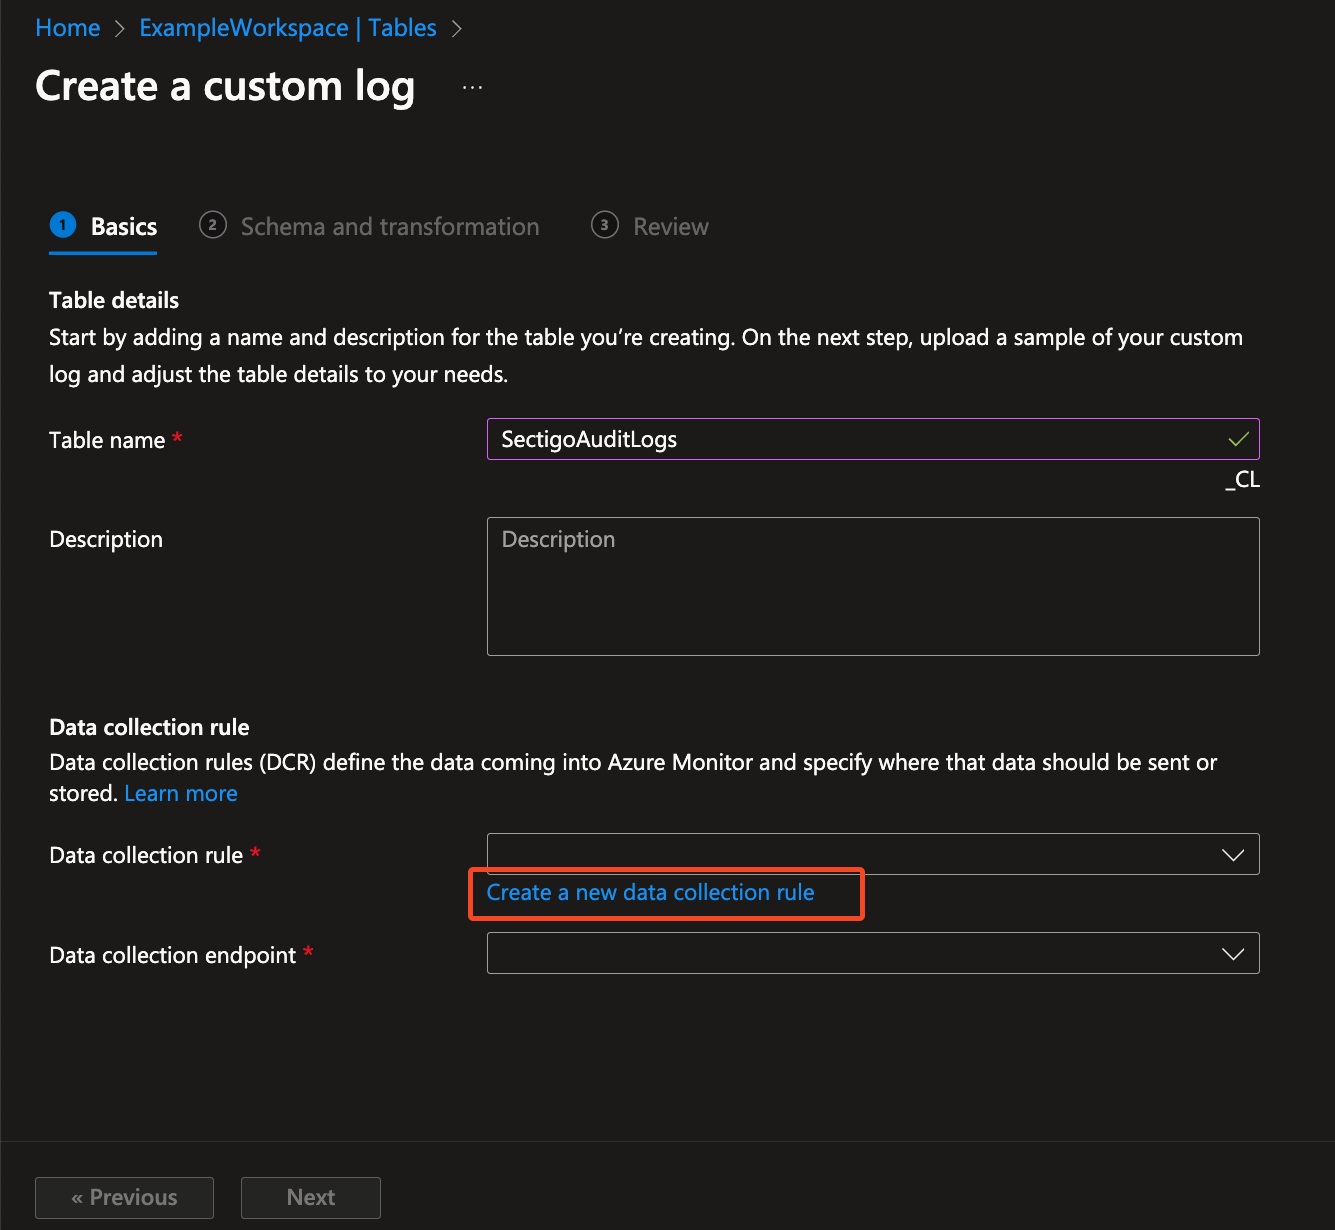
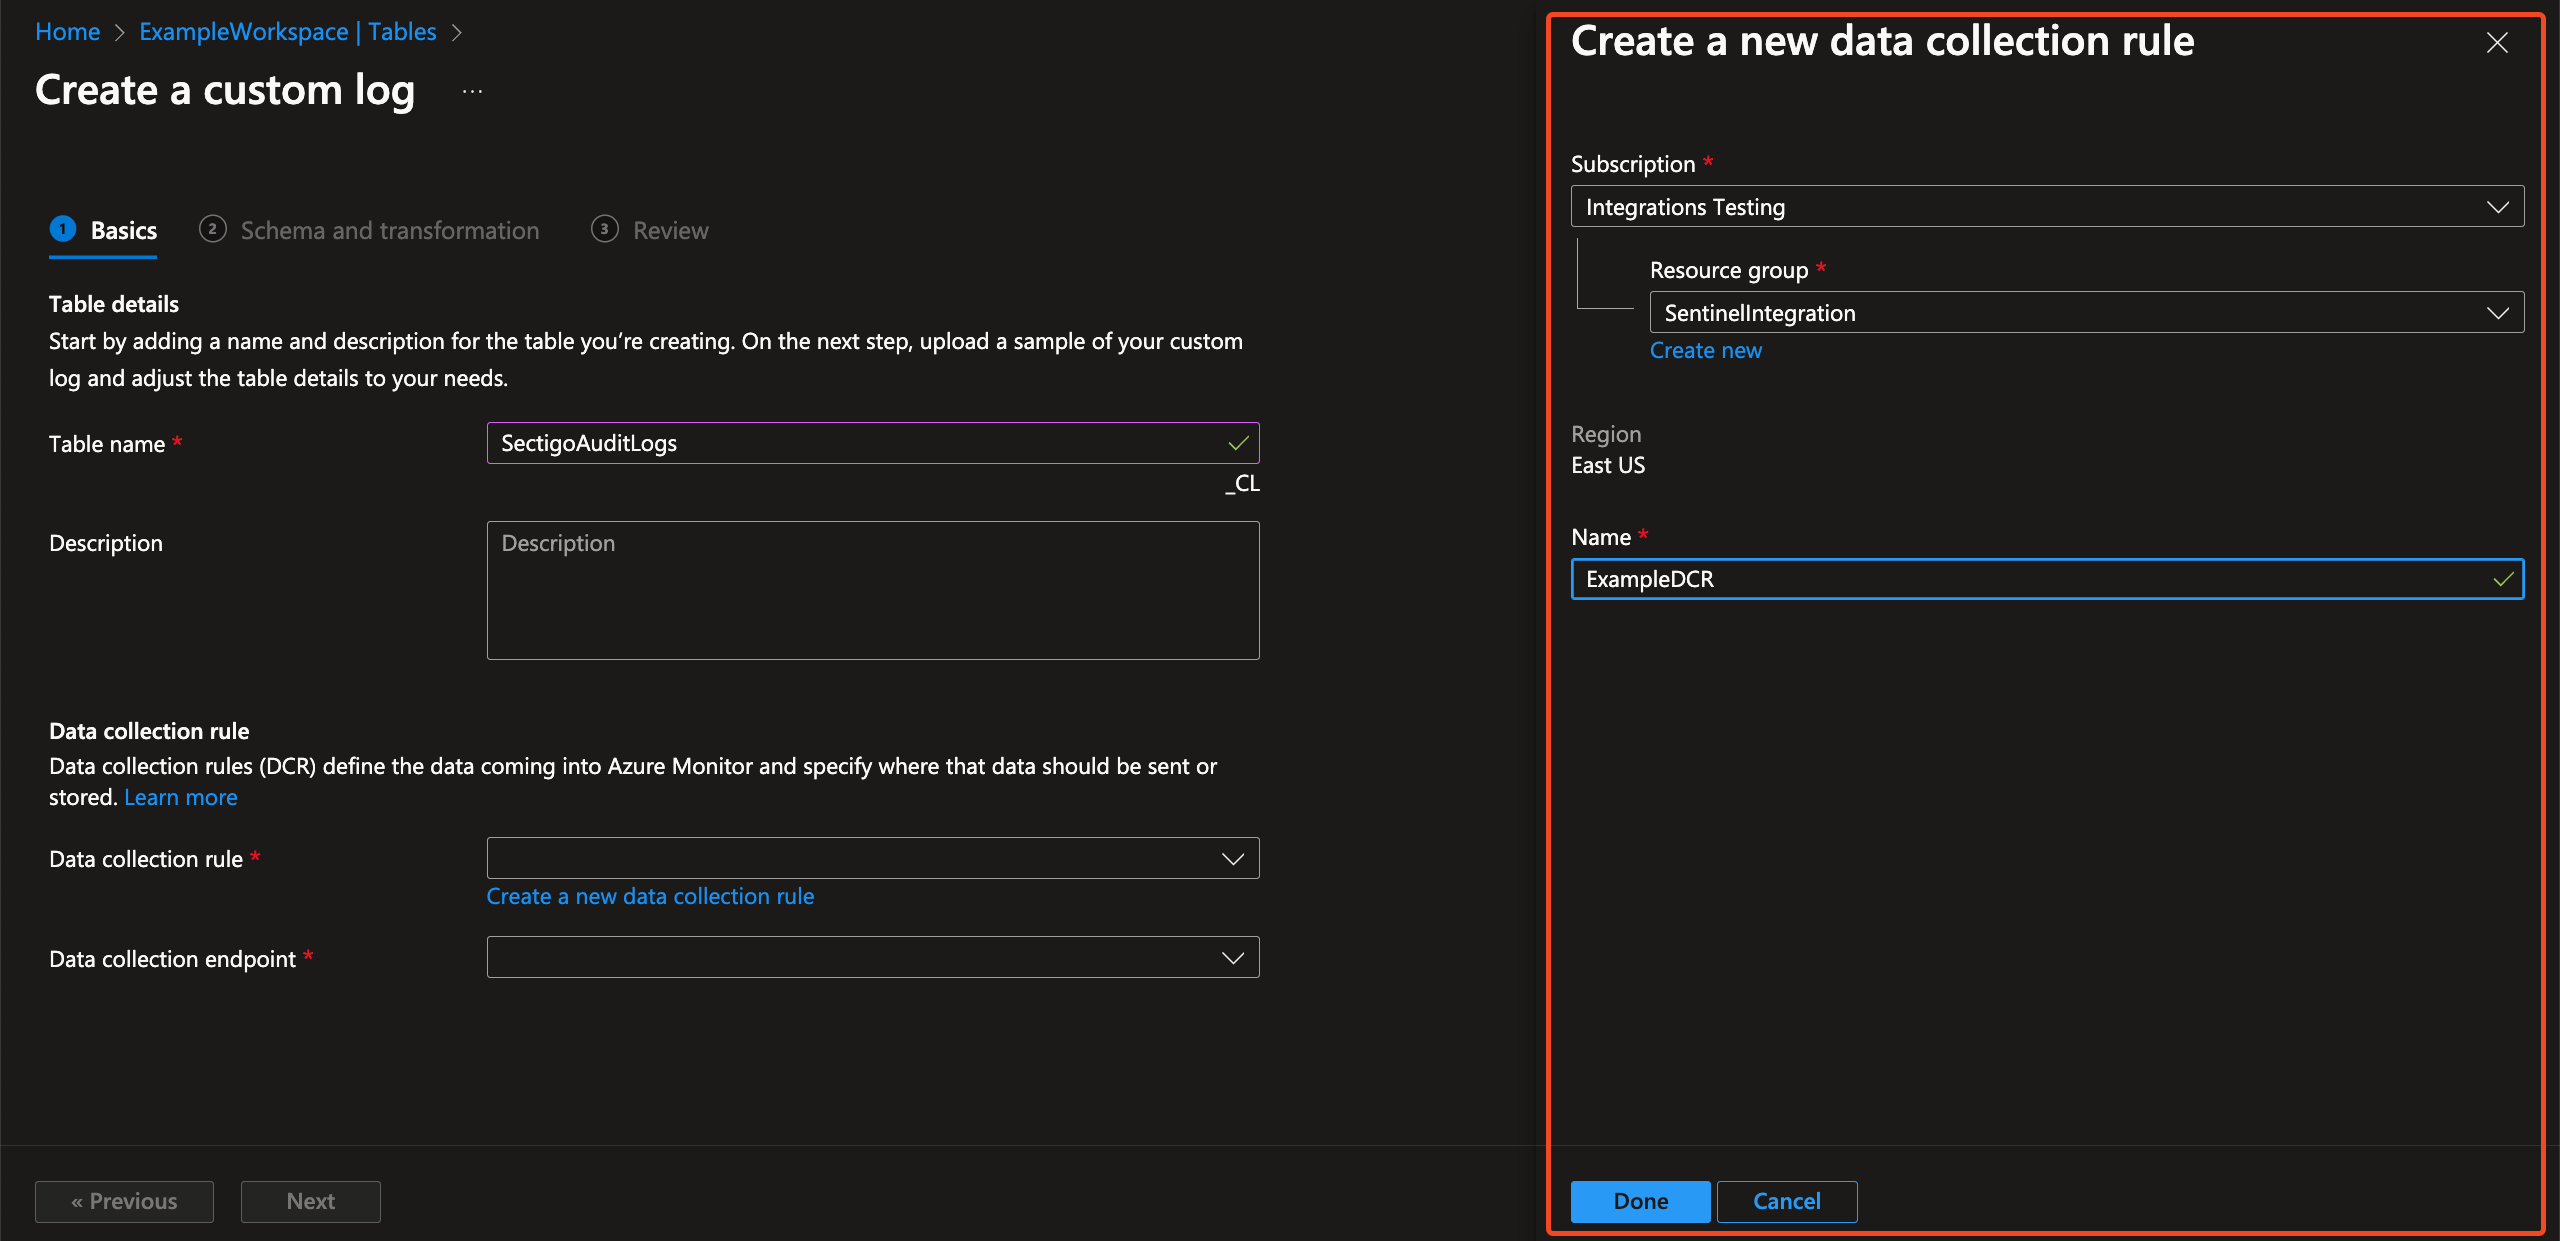
Set the table name to SectigoAuditLogs, and click Create a new data collection rule.
-
Complete the fields to create a new data collection rule (DCR).
Make note of the name, you will need it later.
-
Click Done.
-
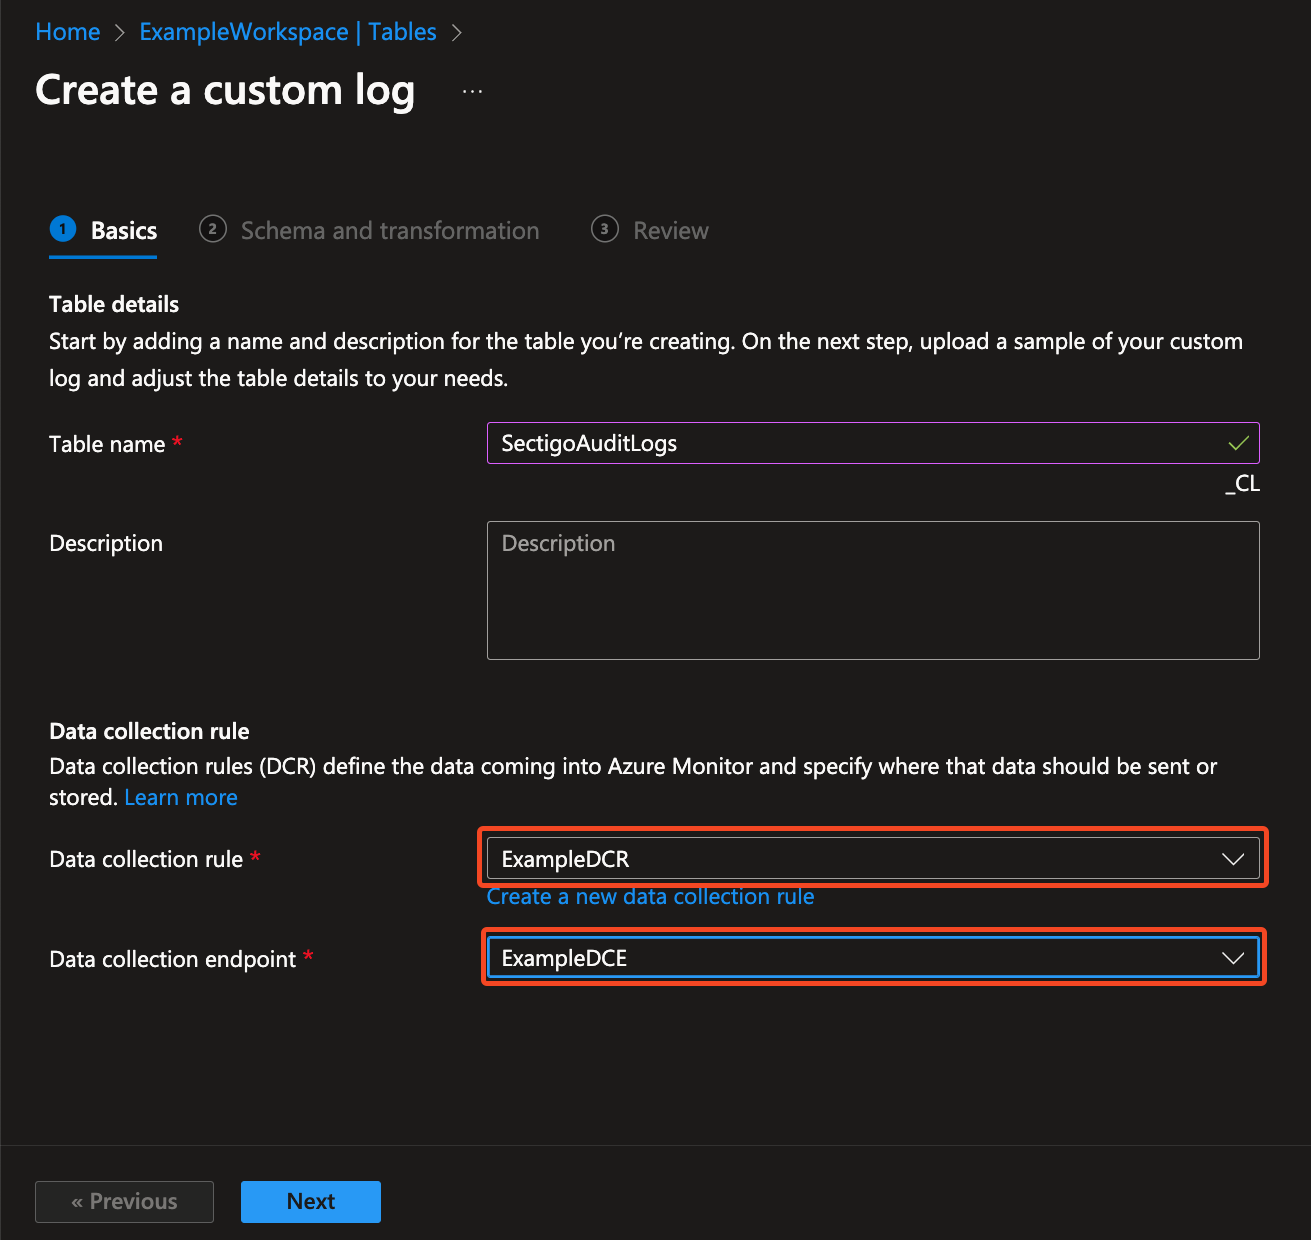
Back on the Create a custom log page, select your Data collection rule and your Data collection endpoint.
-
Click Next.
-
In Schema and transformation, upload a sample log file.
Sample log file
[
  {
    "id": "test id",
    "chain_id": "test chain id",
    "timestamp": "2024-06-18T01:19:29.840753Z",
    "service": "test service",
    "action": "test action",
    "category": "test",
    "role": 1,
    "customer_id": 1,
    "username": "test username",
    "details": "test details",
    "json_details": {
      "test_field1": "test value 1",
      "test_field2": "test value 2"
    },
    "object_id": "test object_id",
    "object_type": "test object_type",
    "object_name": "test object_name",
    "object_acls": "test object_acls"
  }
]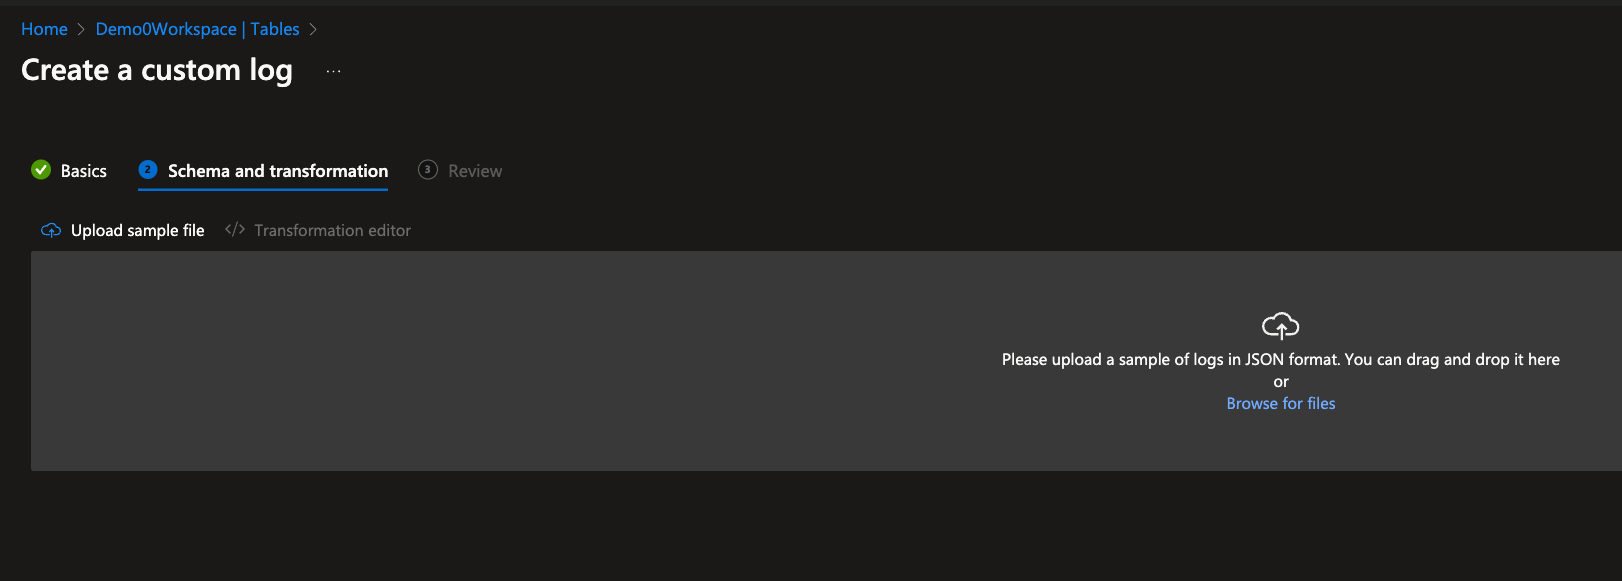
Ignore the TimeGenerated field is not found in the sample providederror. -
Select Transformation editor and type the following KQL query:
source | extend TimeGenerated = todatetime(timestamp) | project TimeGenerated, service, action, login_id=username, customer_id, details = json_details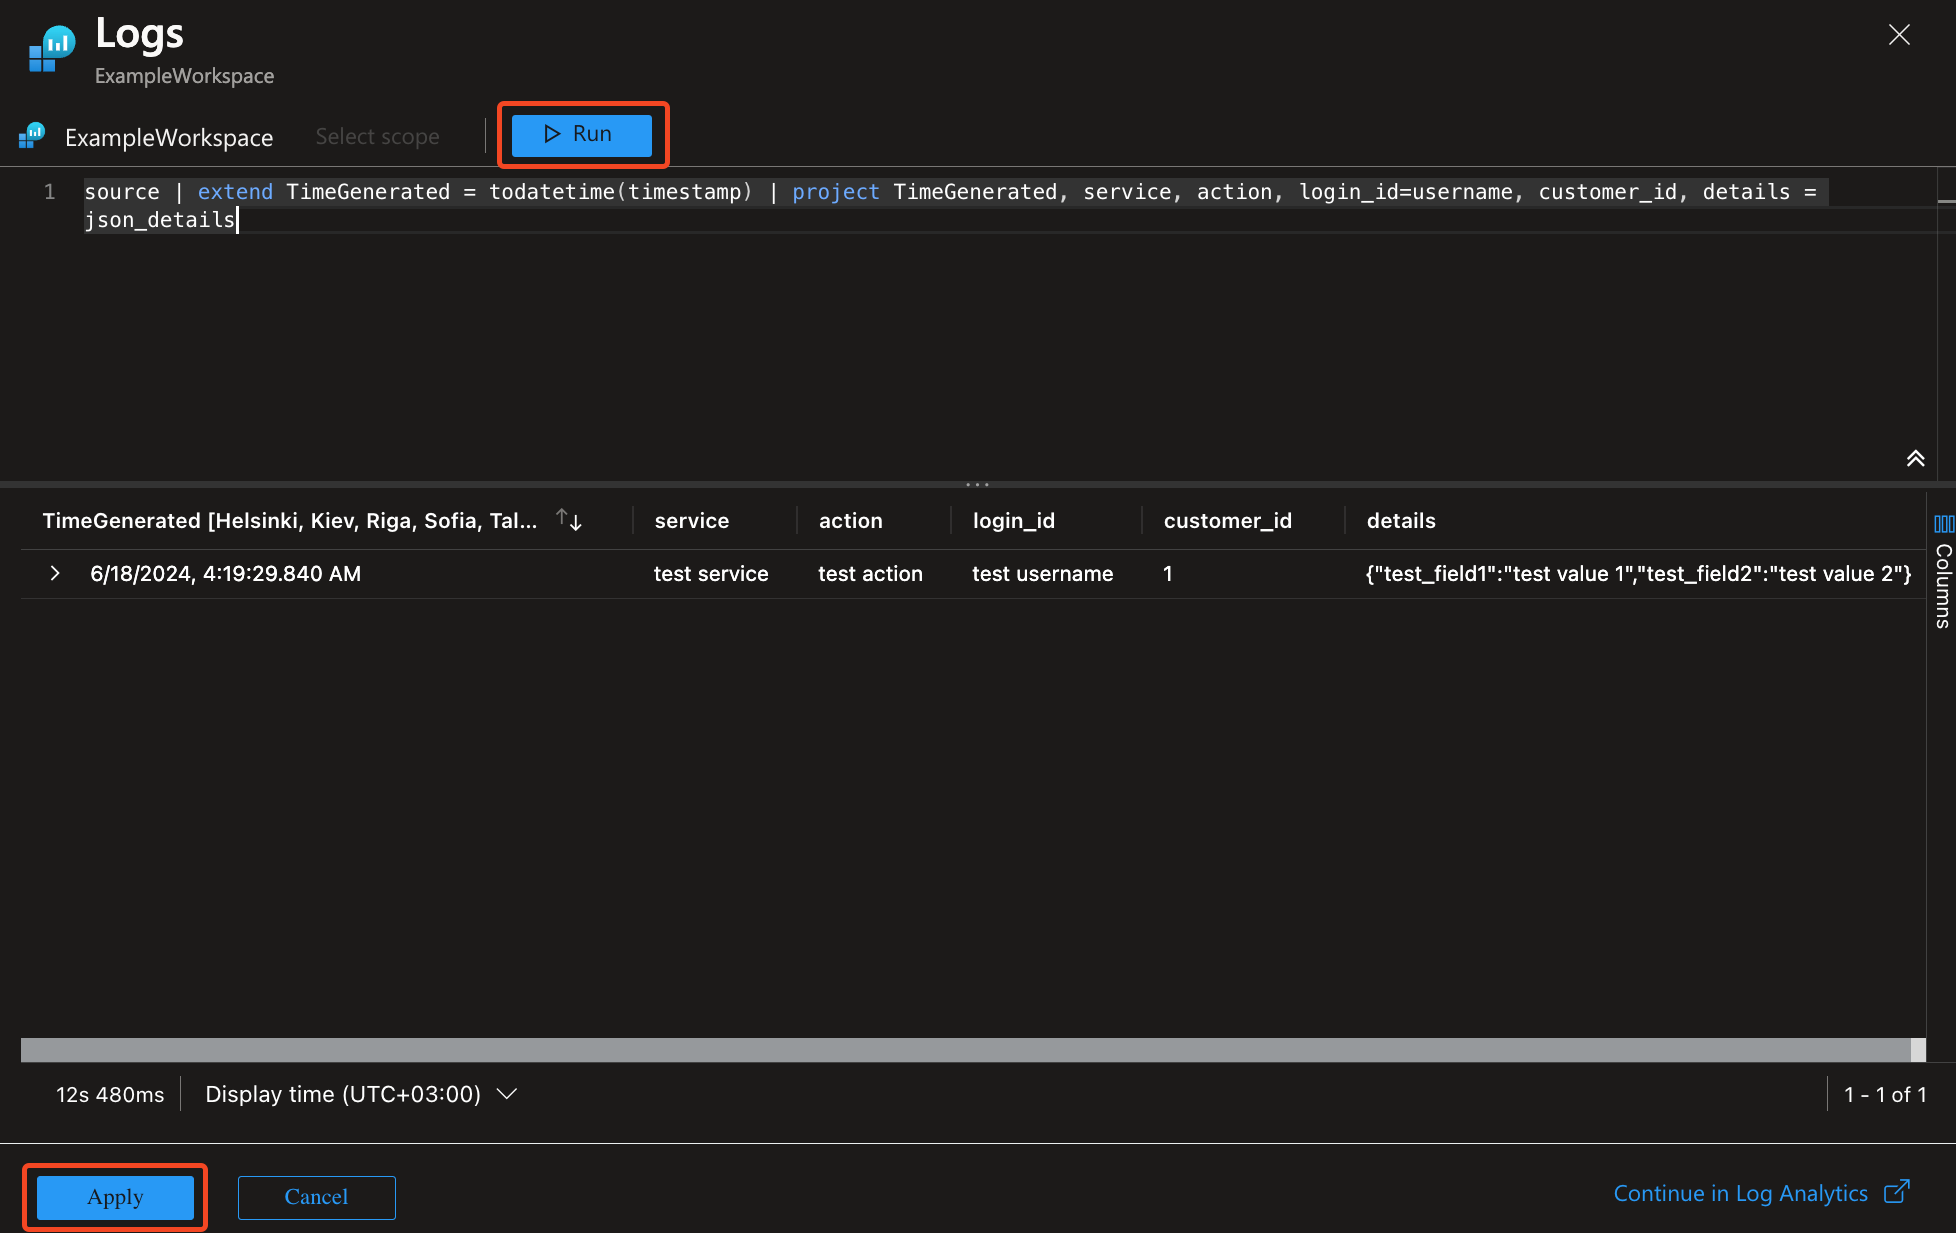
-
Click Run, then Apply.
-
Click Next, then Create.
You should see the new custom table listed in the workspace.
Create a Function App
-
Go to Data Collection Rules, click on the DCR you created when you created the custom table, and make note of the Immutable Id for use in a later step.
In this example we will call it DCR_IMMUTABLE_ID. -
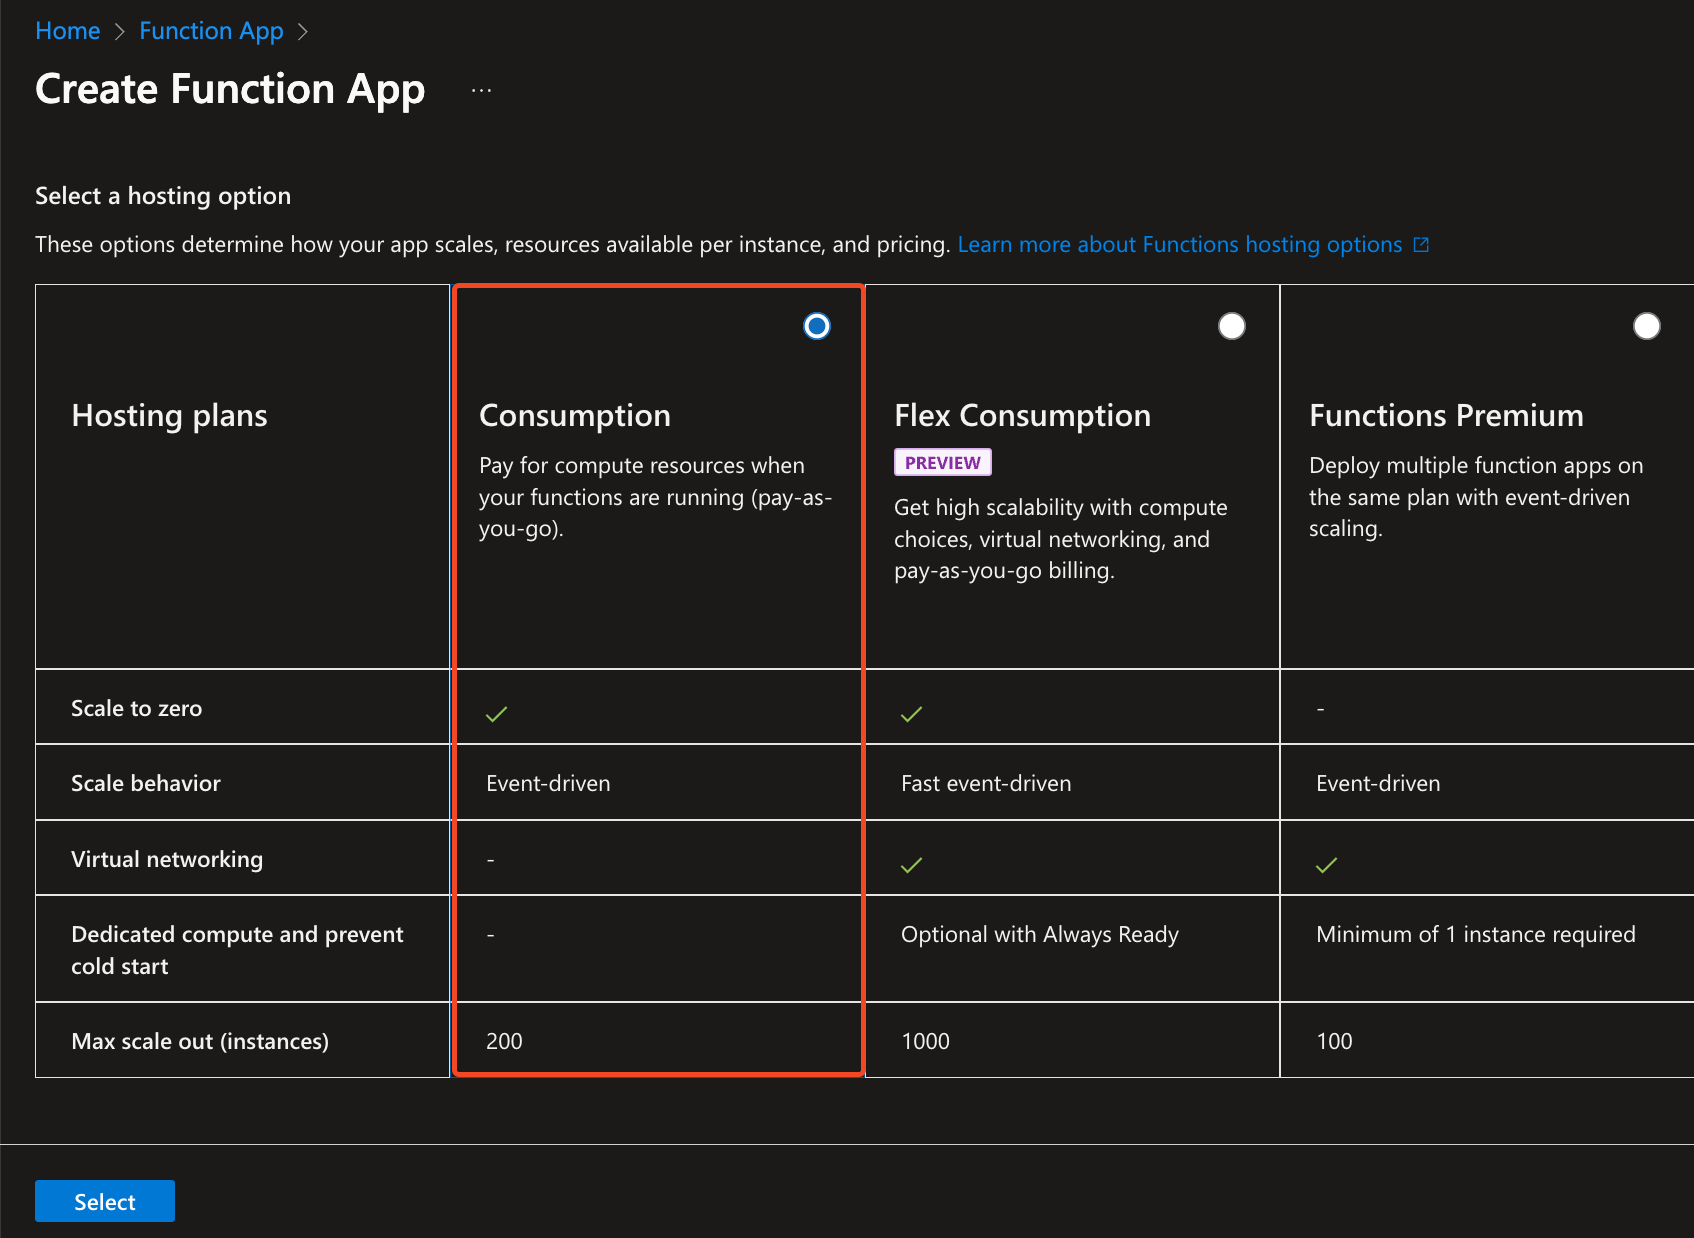
Go to Azure’s Function App page and click Create.
-
Select the Consumption plan, and click Select.
Use the
<CompanyName>-SectigoAuditLogAppconvention.Don’t be concerned with the predictability of the URL, the public access will be turned off. -
Make note of the Function App name and the Resource Group name for later use.
In this example we will call them FUNCTION_APP_NAME and FUNCTION_APP_RESOURCE_GROUP. 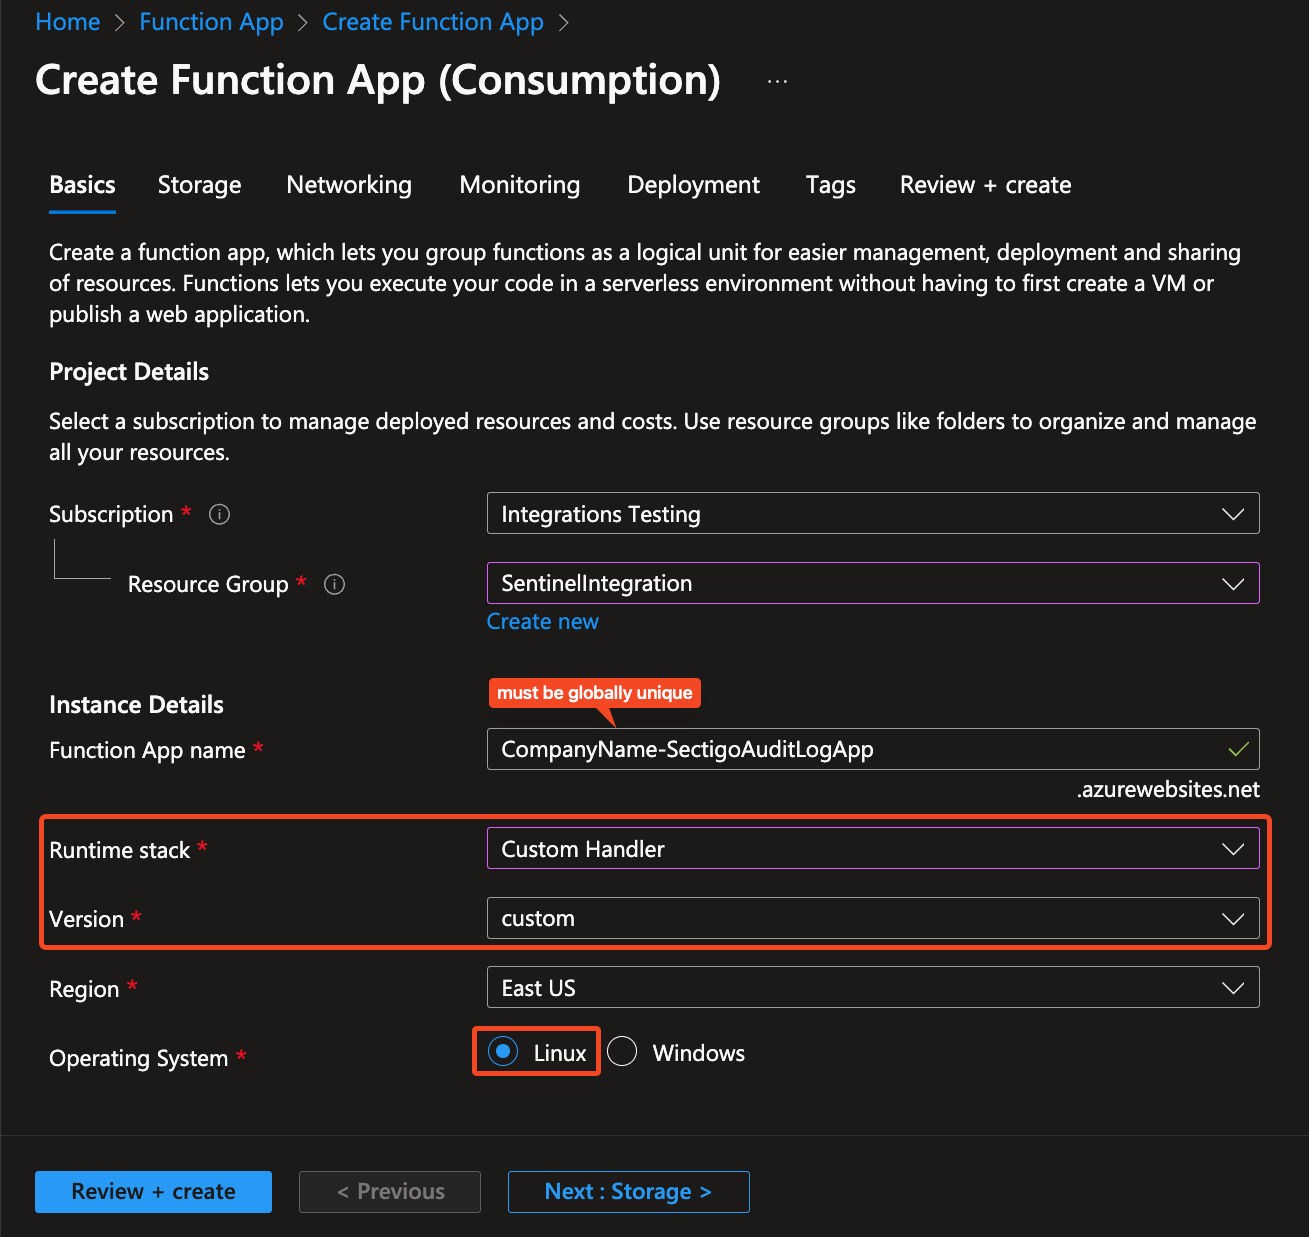
-
Click Next : Storage.
-
Select an existing storage account or leave it and Azure will create one.
-
Click Next : Networking.
-
Disable public access.
-
Click Next : Monitoring.
-
Select Yes for Enable Application Insights.
-
Select an existing Application Insights or leave it and Azure will create one.
-
Click Review + create, then Create.
Assign permissions for Function App to the DCR
-
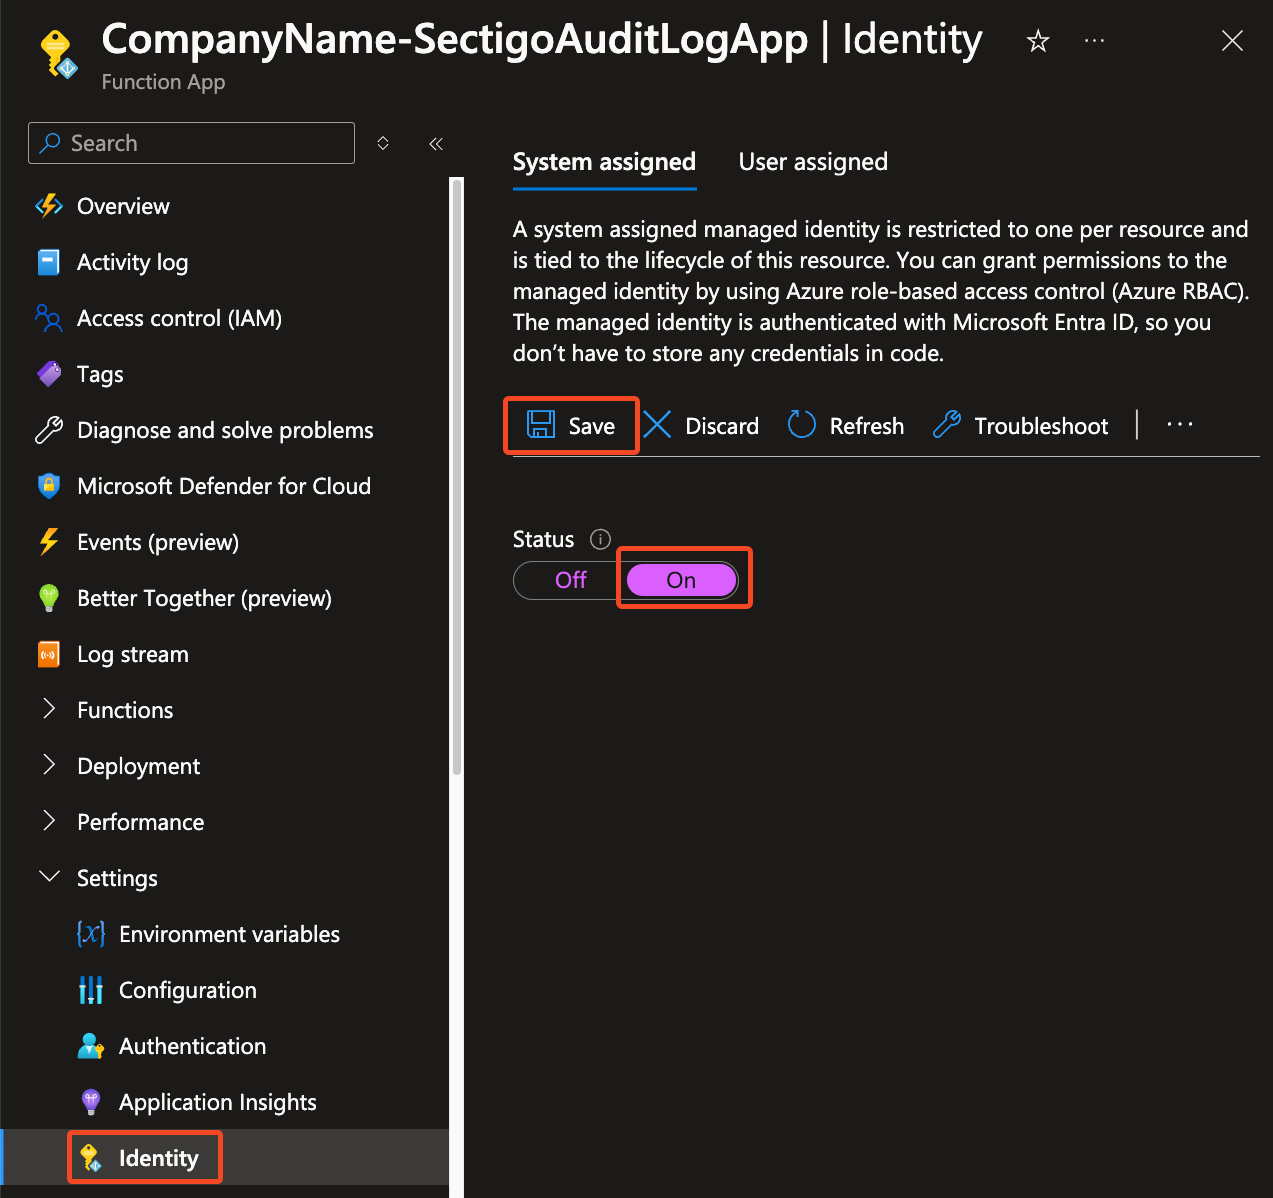
Go to Function App > Settings > Identity.
-
Select System assigned and turn the Status to On.
-
Click Save.
-
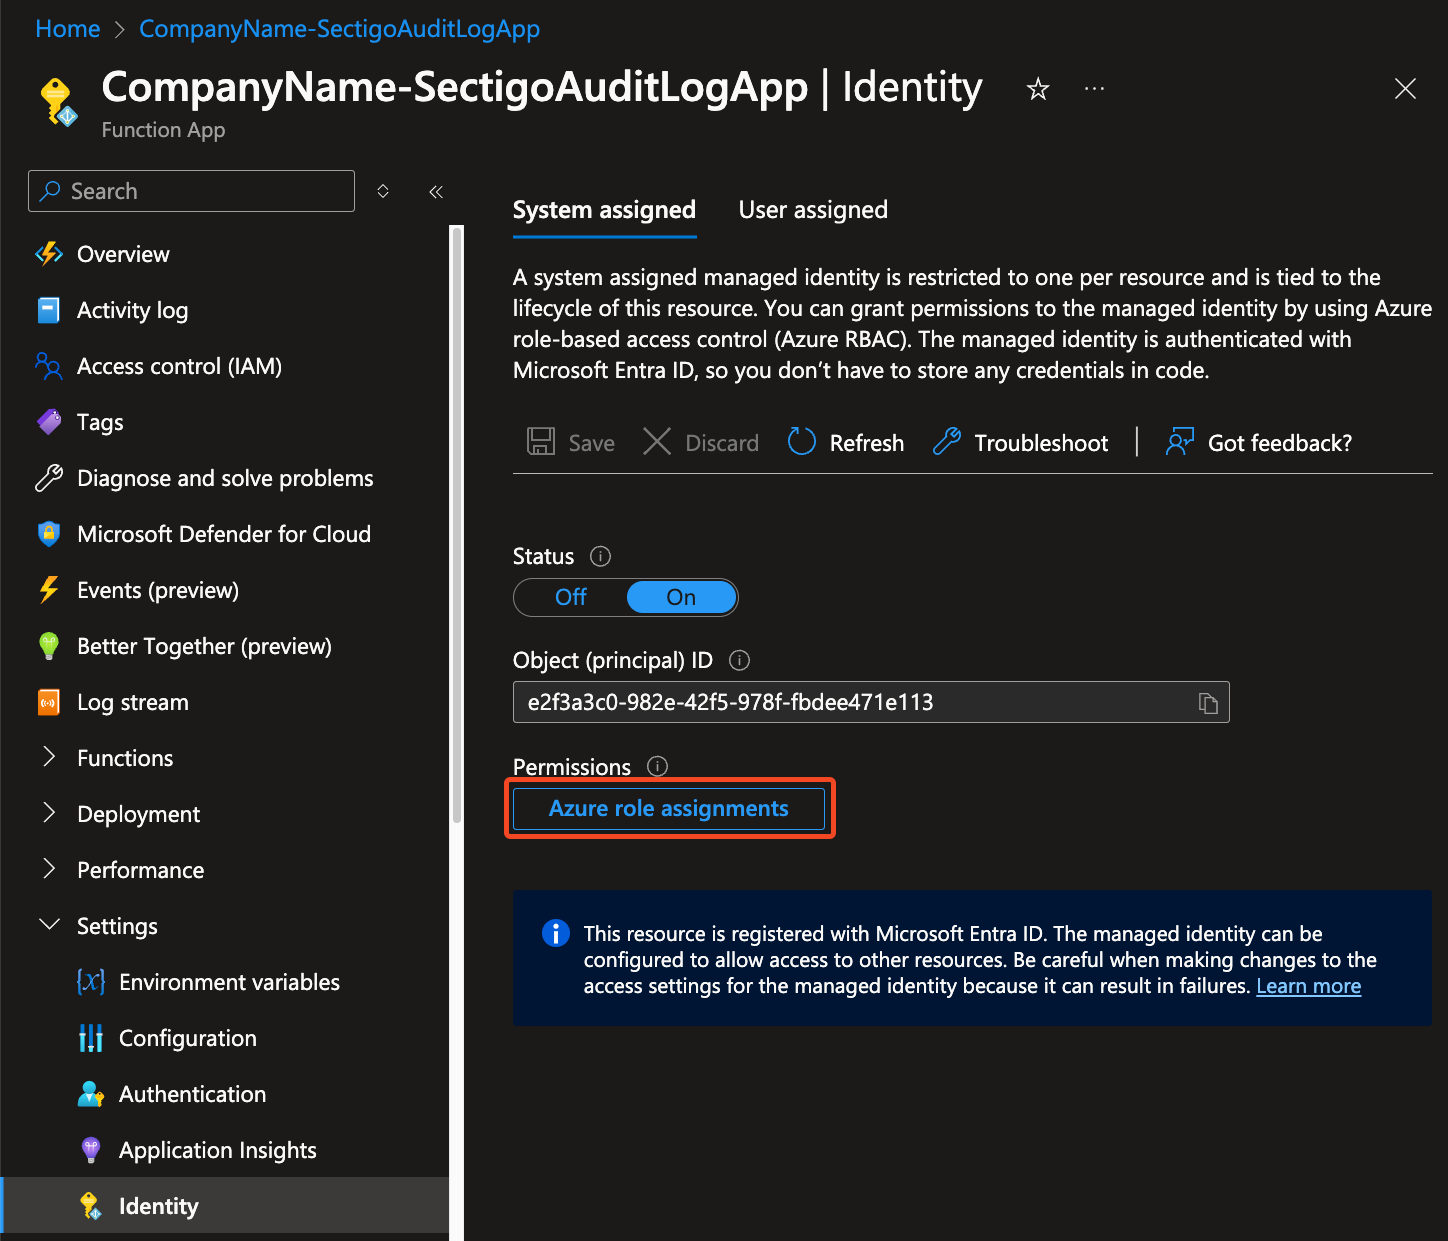
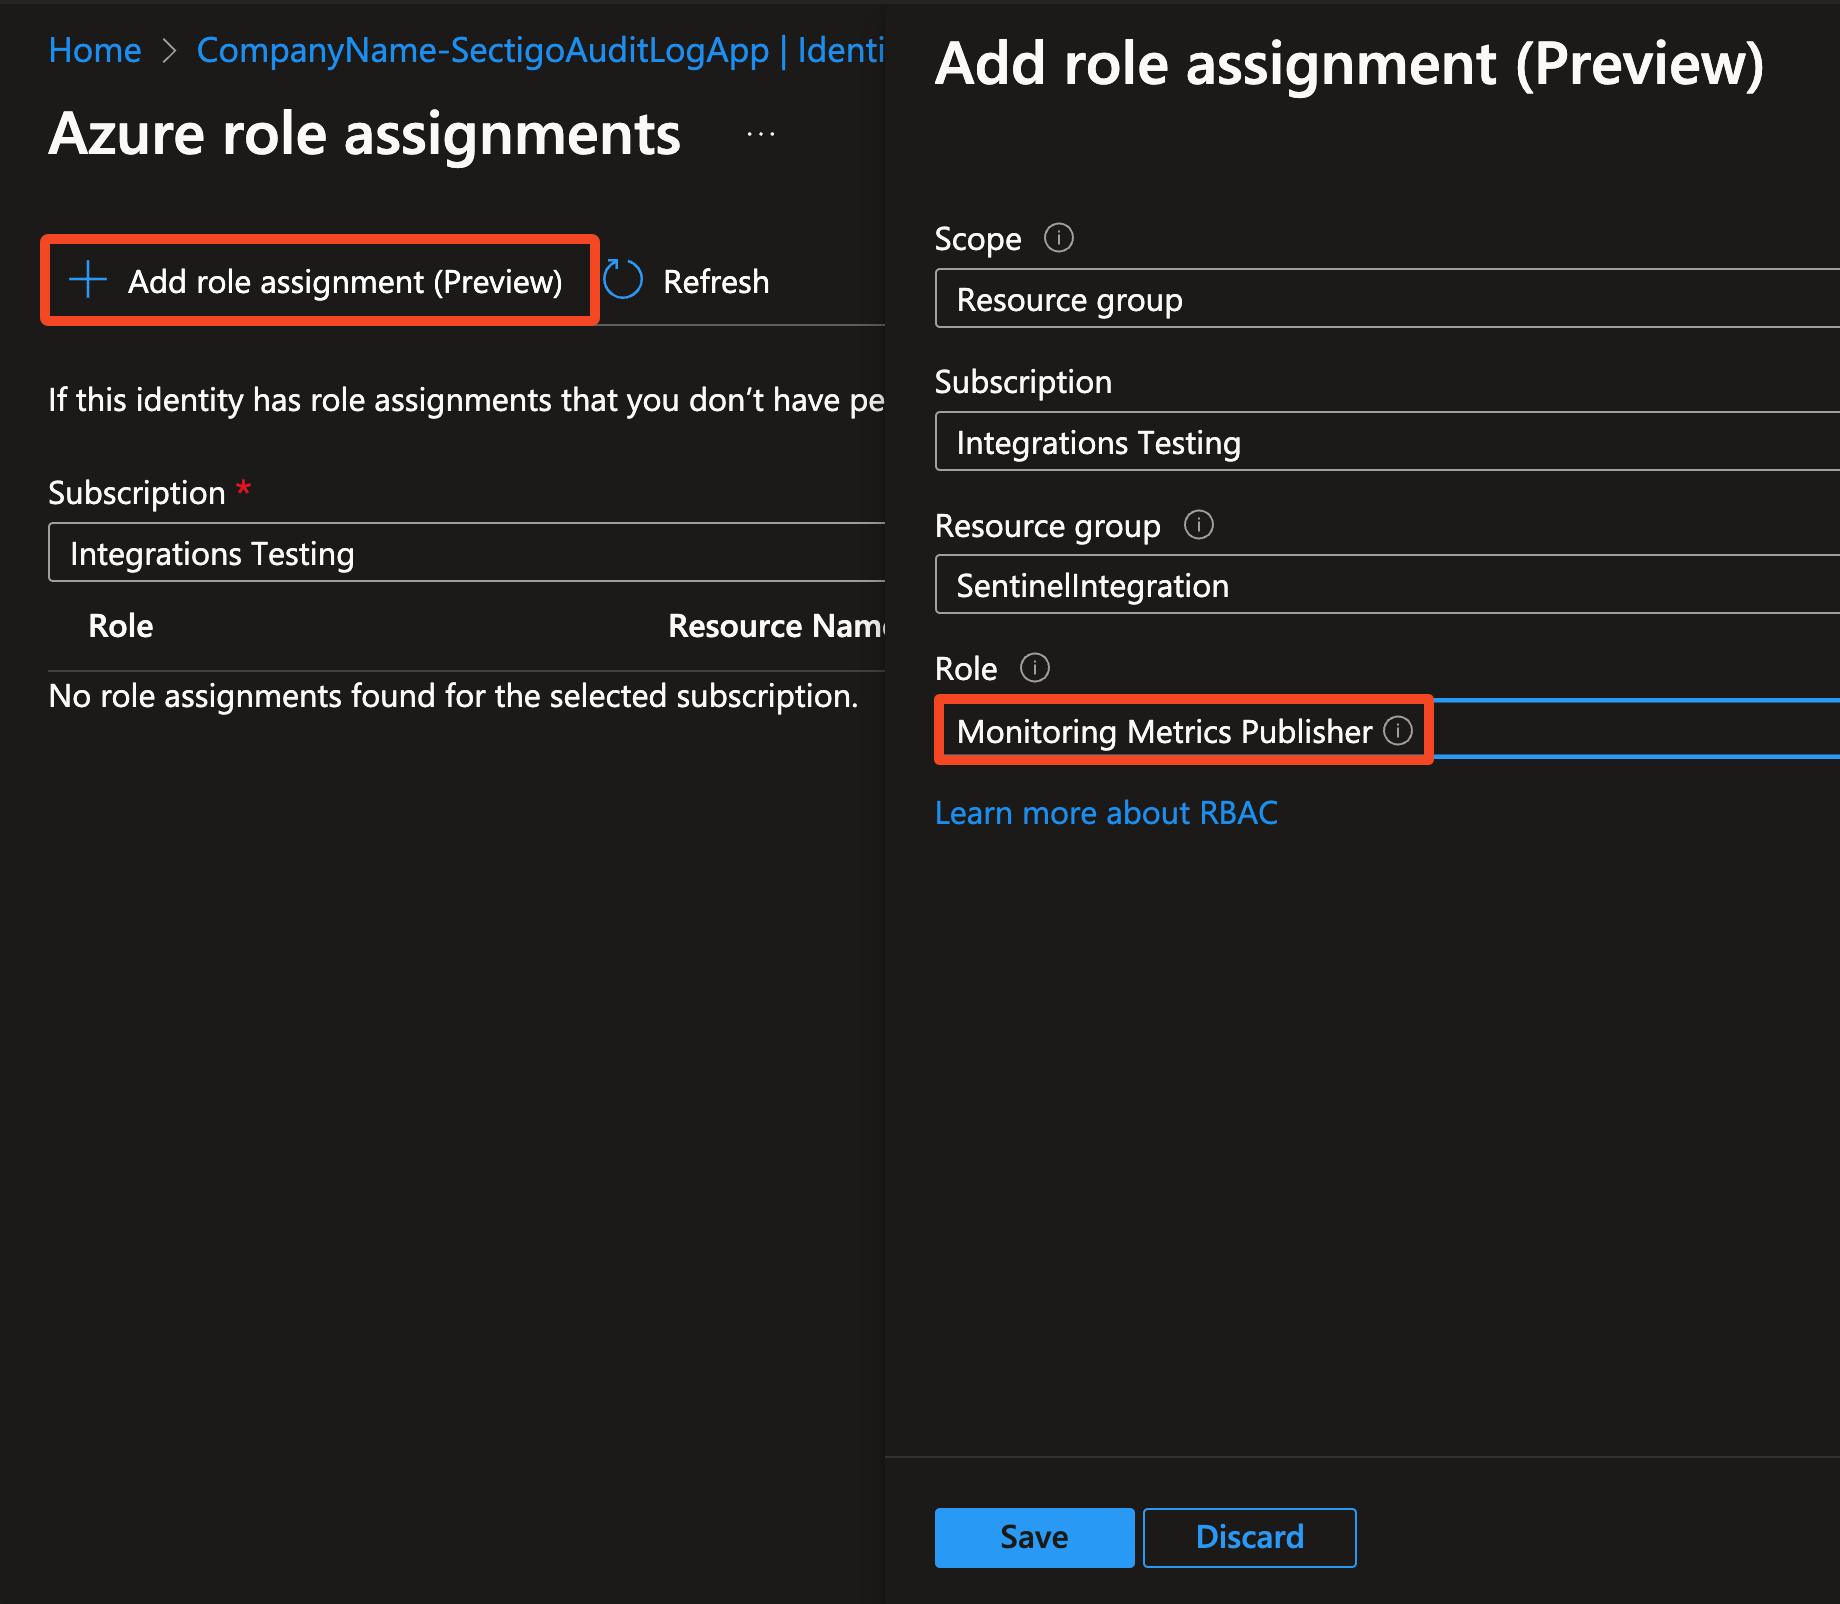
Click Azure role assignments.
-
Click Add role assignment.
-
Set scope to Resource group.
-
Select the Resource group that the DCR belongs to.
-
Set role to Monitoring Metrics Publisher.
-
Click Save.
Configure Function App
-
Navigate to Function App > Settings > Scale Out.
-
Set Maximum Scale Out Limit to 1, and click Save.
-
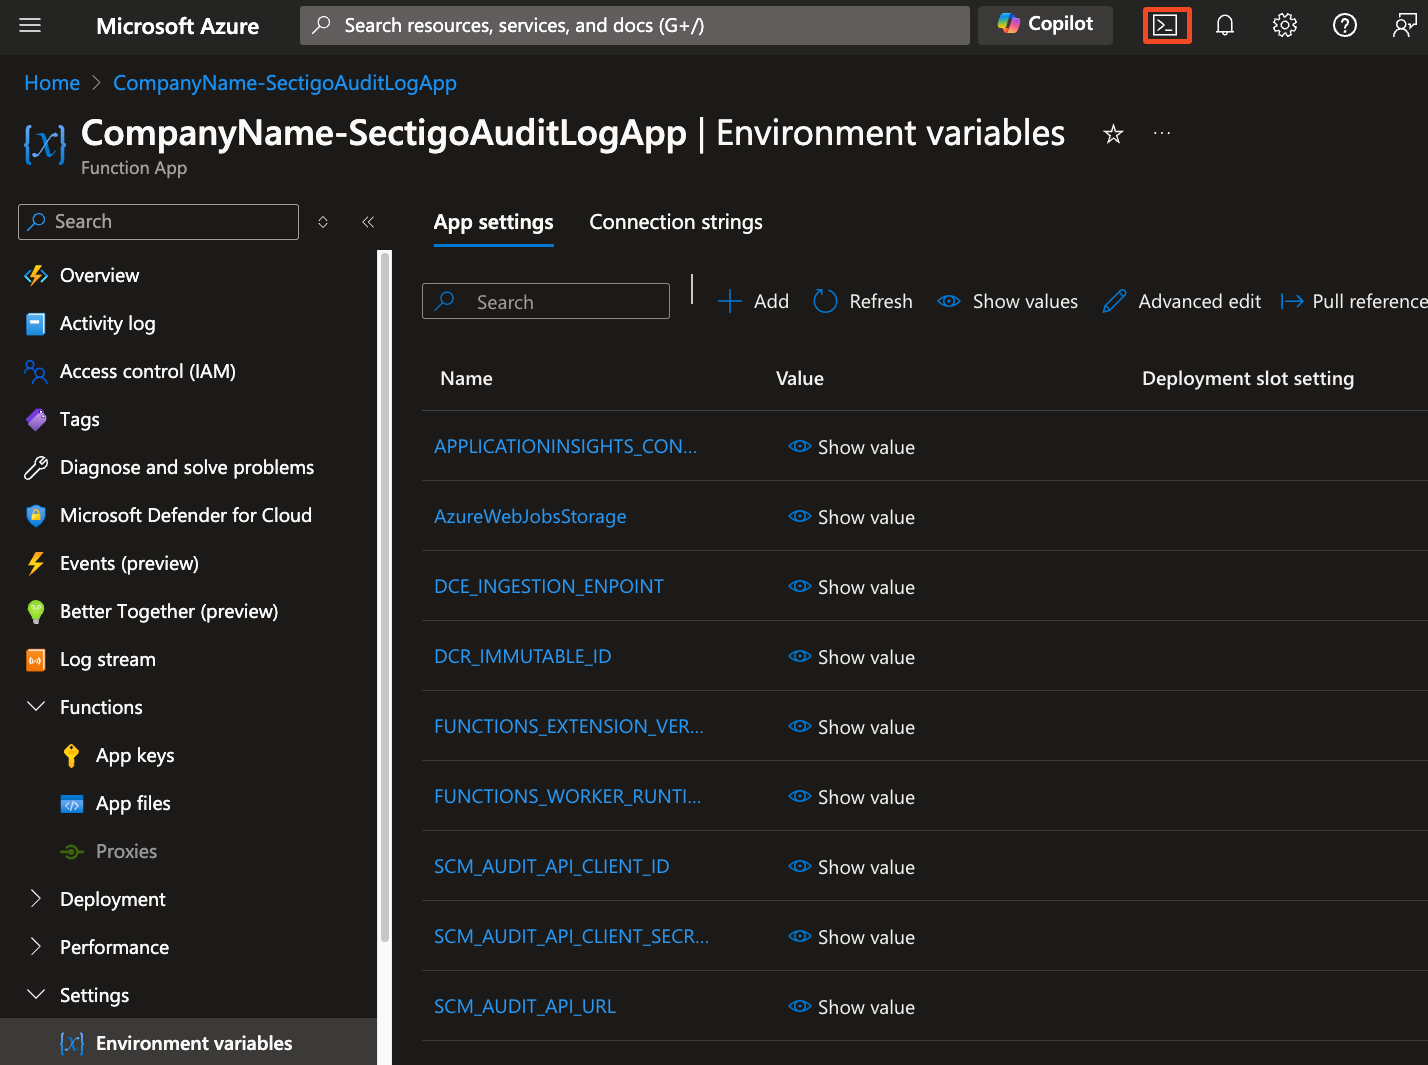
In Settings > Environment variables, click Add.
-
Add the following environment variables:
Name Description Mandatory DCE_INGESTION_ENDPOINT
The logs ingestion URL from Create data collection endpoint, step 7
Yes
DCR_IMMUTABLE_ID
The DCR immutible ID from Create Function App, step 1
Yes
SCM_AUDIT_API_URL
The URL of the SCM Audit API. The possible values are:
Yes
SCM_AUDIT_API_CLIENT_ID
The Client ID from Obtain the SCM Audit API credentials, step 5
Yes
SCM_AUDIT_API_CLIENT_SECRET
The Client Secret from Obtain the SCM Audit API credentials, step 5
Yes
SCM_AUDIT_LAST_N_DAYS
Controls how many days of log history to be imported when integration starts.
Must be in range [0, 30]
Default is 30. Set to 0 if you are not interested in logs prior to this integration.
No

-
Click Apply.
-
Click Confirm.
Deploy connector to Function App
-
Still in Environment variables, click the Azure Cloud Shell session icon in the top right.
-
Go to Manage files > Upload and upload the integration package.

-
Modify and run the following command:
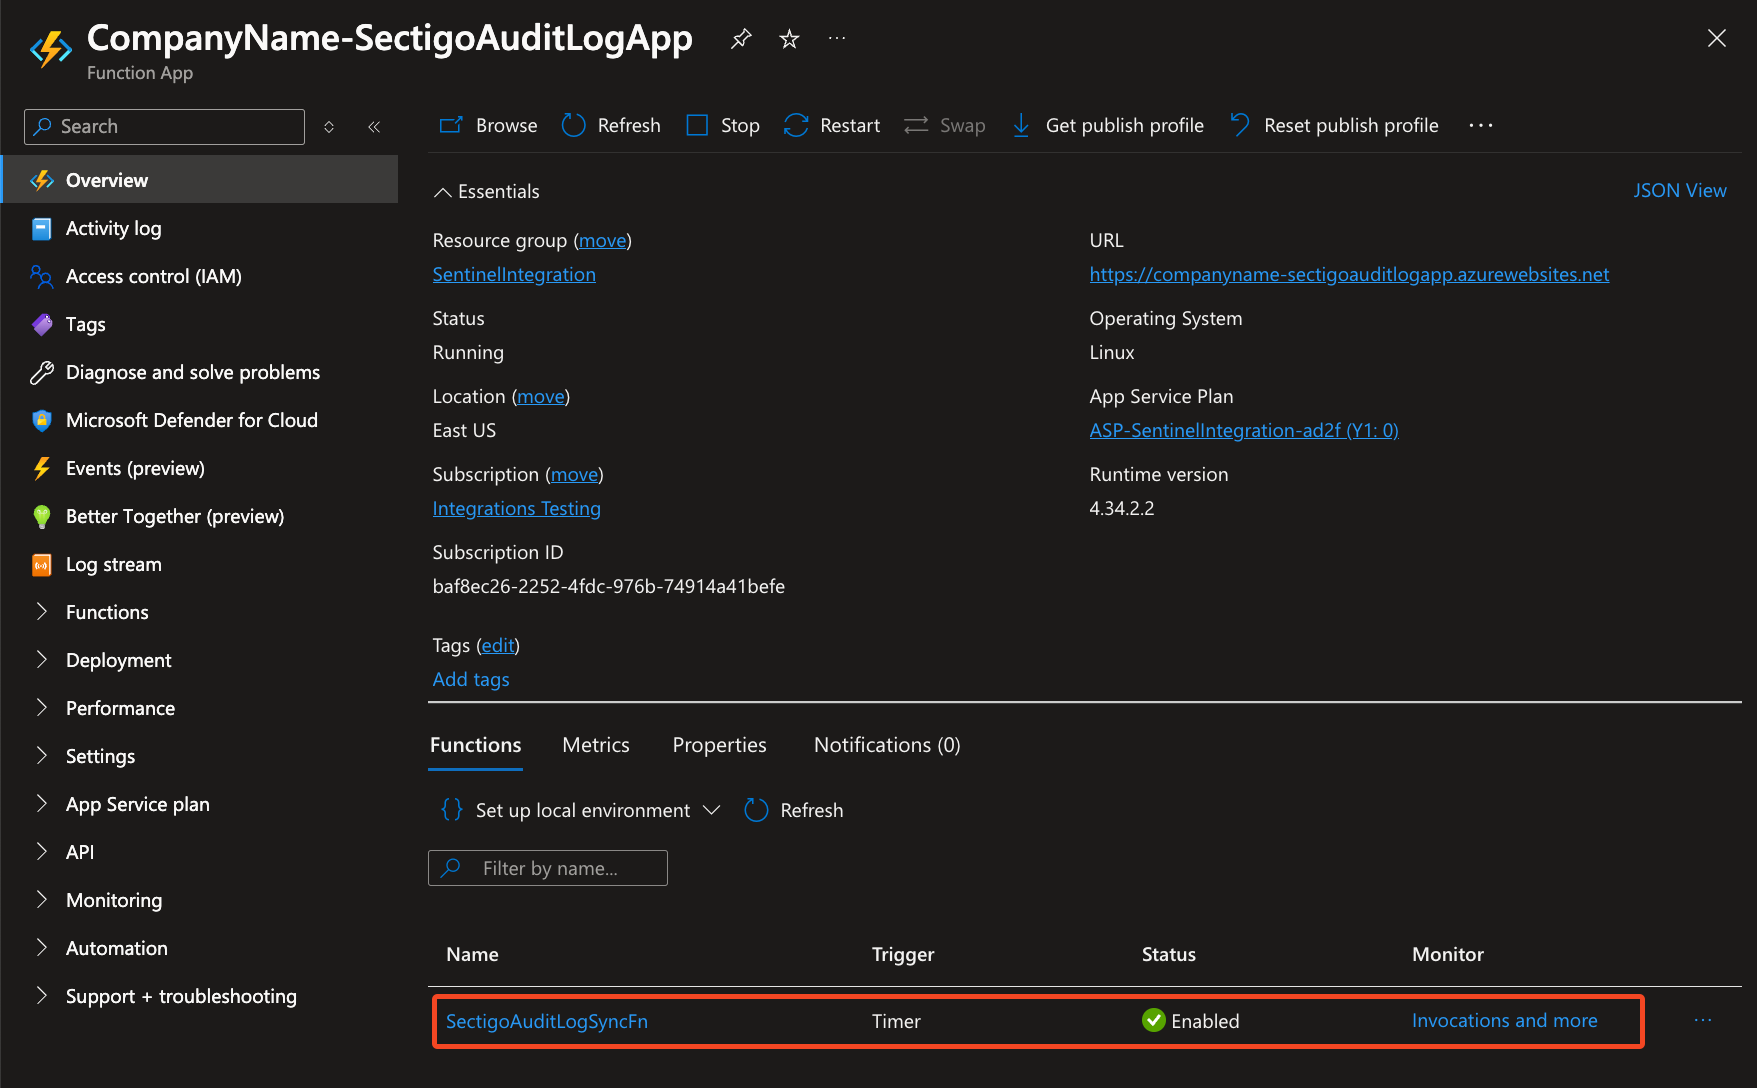
`az functionapp deployment source config-zip -g "<FUNCTION_APP_RESOURCE_GROUP>" -n "<FUNCTION_APP_NAME>" --src "<uploaded package file.zip>"`The deployed function will be listed on the Function App page.
-
To check that synchronization works, click the name of the function and switch to the Logs tab.
-
It will stream function runtime logs.
-
You should see the message
sync processes finished successfully.
-