Configuring the connector
This page describes how to configure the connector: install the dependencies and set up the configuration files.
Install the dependencies
-
Install the pip package installer for Python.
-
Extract the contents of the
kemp-sectigocm-<version>.ziparchive to the current directory. -
Navigate to the
kemp-sectigocm-<version>directory. -
Install Python dependencies listed in the
requirements.txtfile.We recommend that you install Python packages into a virtual environment.
Validate the domains
-
Log in to SCM at
https://cert-manager.com/customer/<customer_uri>with the MRAO administrator credentials provided to your organization.Sectigo runs multiple instances of SCM. The main instance of SCM is accessible at https://cert-manager.com. If your account is on a different instance, adjust the URL accordingly. -
(Optional) Navigate to the Organizations page to see if an organization with departments already exists. On this page you can create a new organization or add departments to an existing organization.
To add an organization:
-
Click Add.
-
Complete the fields with the organization’s details, then click Next.
-
Configure settings for specific types of certificates.
-
Click Save.
-
Select the newly created organization from the list of organizations.
-
Click Add Department and complete the fields with the department’s details.
-
Click Validate to start the validation process for this organization.
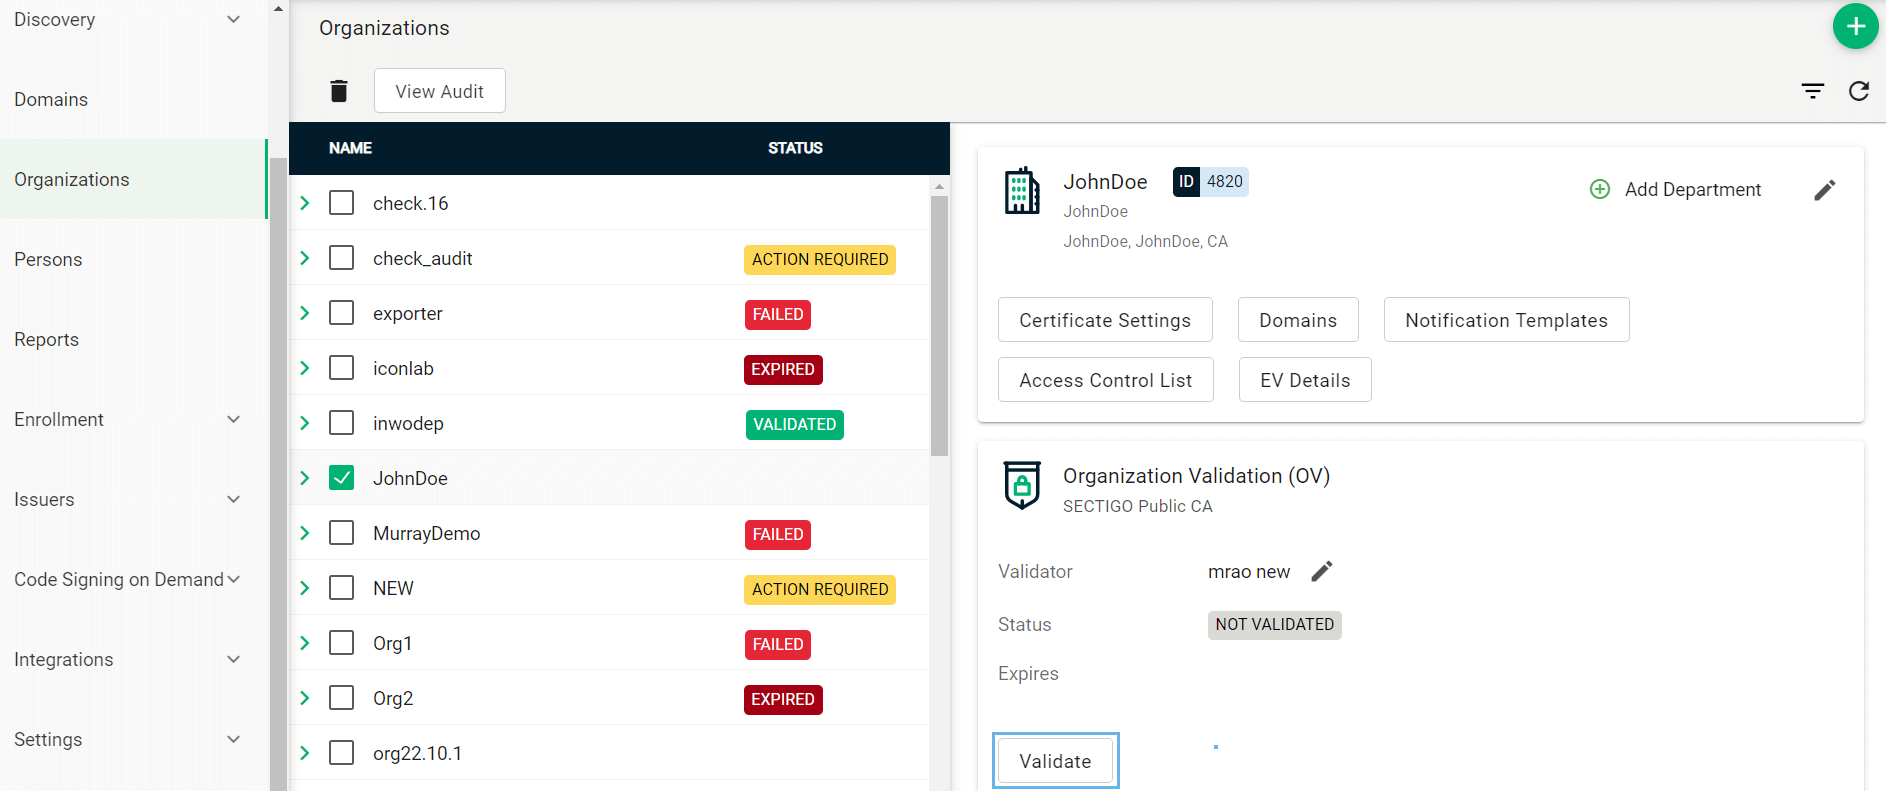
-
-
Navigate to the Domains page.

-
To create a new domain entry, click Add.
-
Specify the domain name, select the organizations/departments to delegate the domain to, and the allowed certificate types.
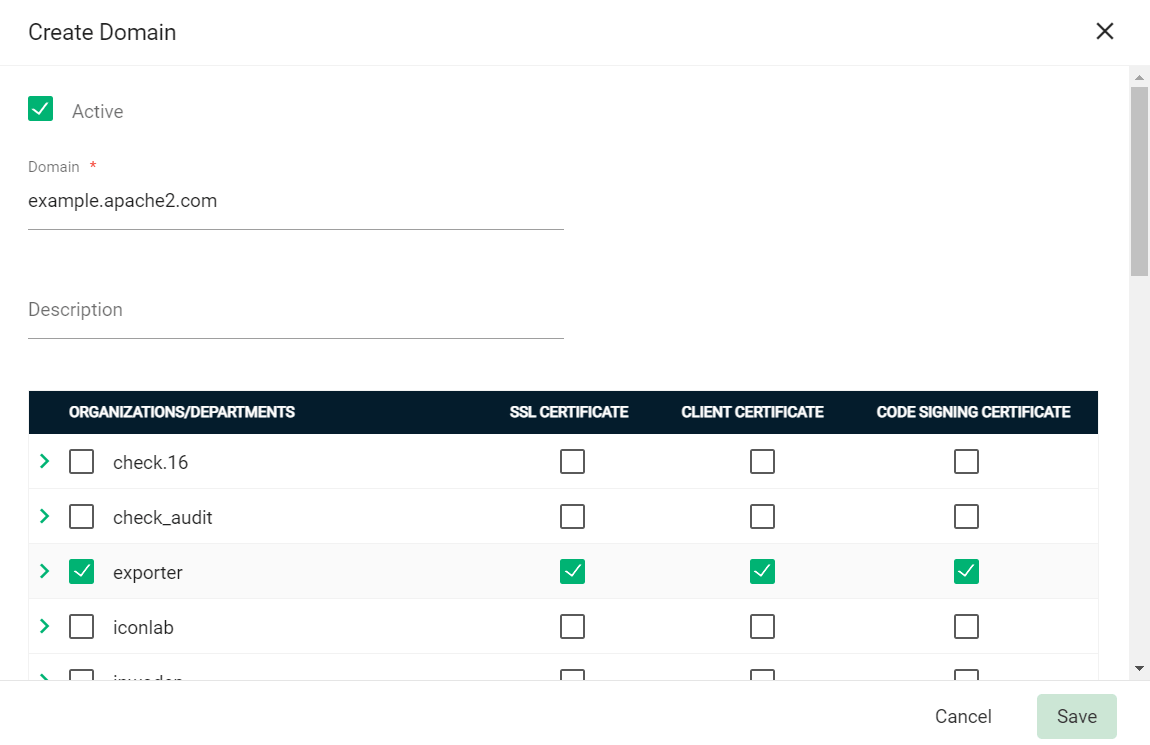
-
Click Save.
-
If your organization or department requires delegations to be approved:
-
Select the newly created domain from the list of domains.
-
Click Approve Delegations.

-
Select the organization or department, then click Approve.
To change the organization or department which the domain is delegated to, click Delegate and select the appropriate Organizations/Departments.
-
-
(Public CA only) Validate your domain:
-
Select your domain and click Validate.

-
Select the appropriate DCV method as per your initial setup.
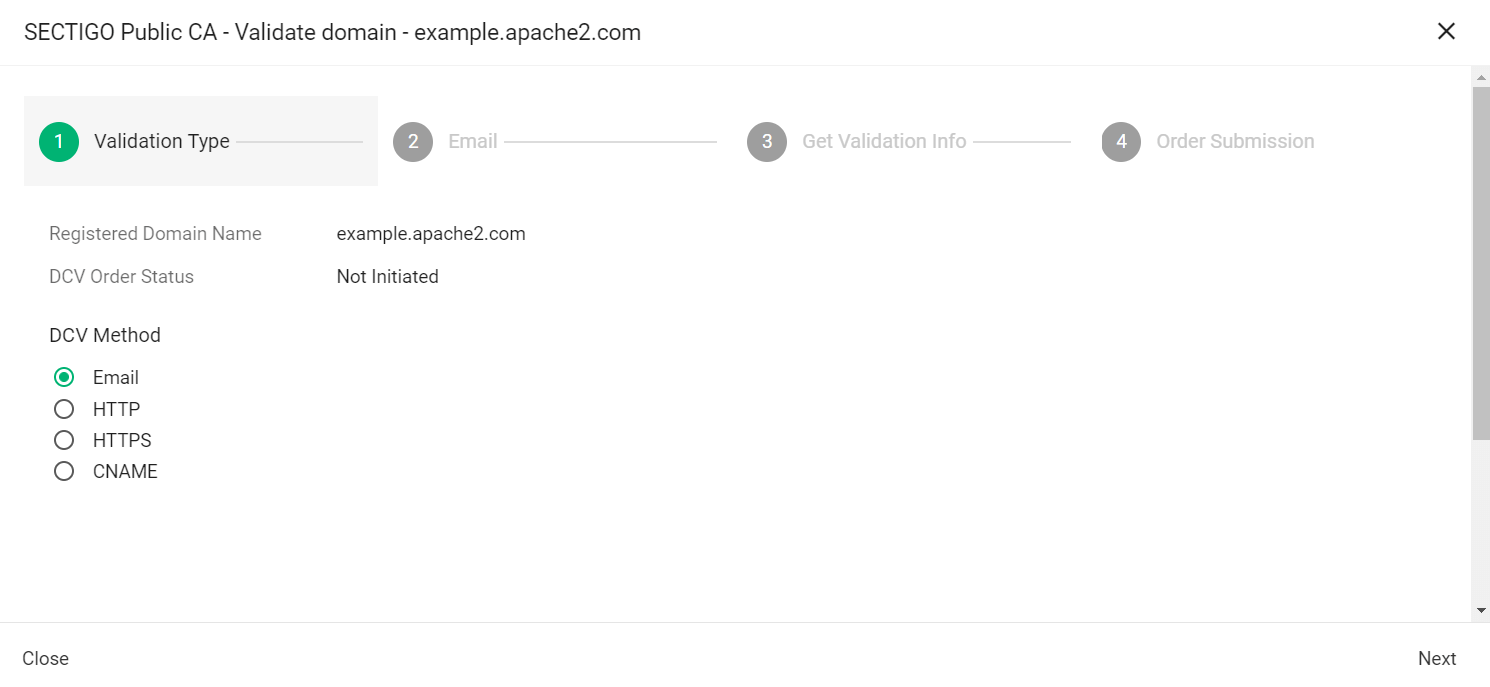
The following steps assume that you selected Email as the DCV method. -
Click Next.
-
In Select an email address, select a registered email.
-
Click Submit.
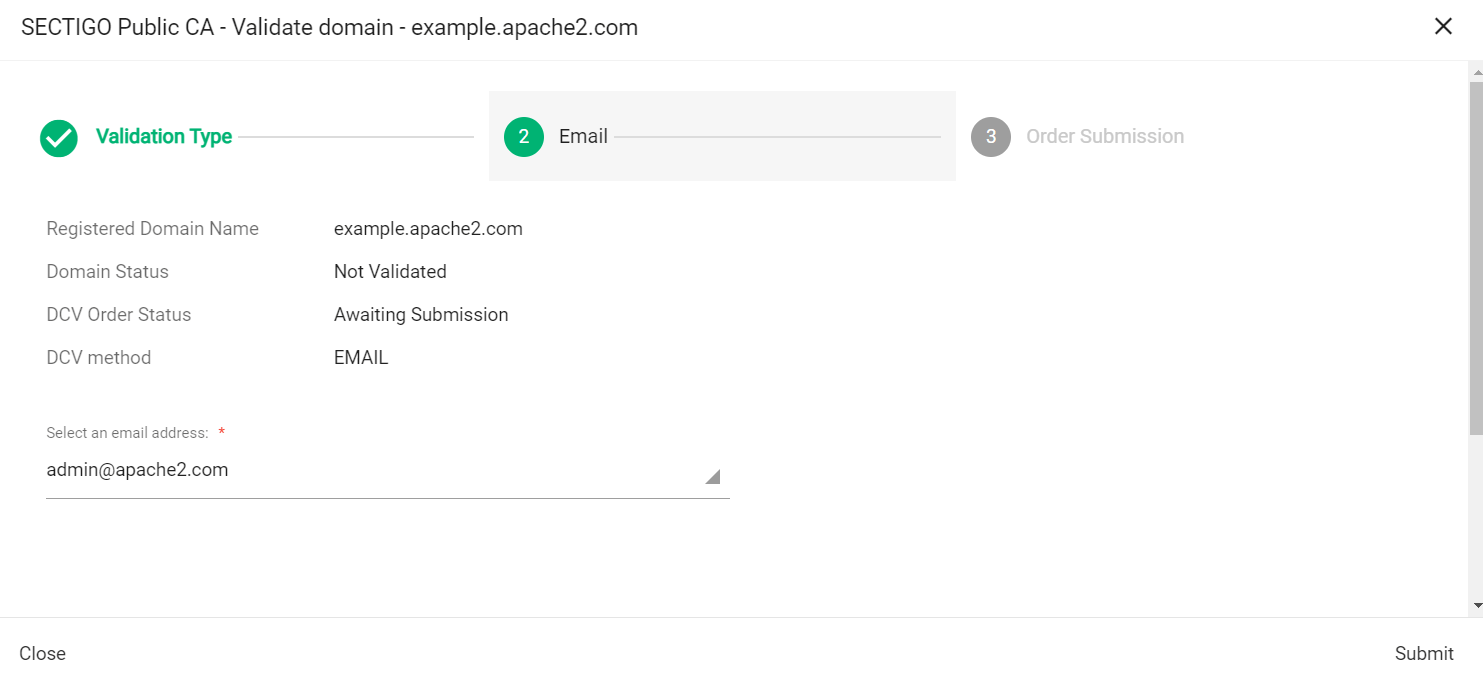
A message confirms that the validation letter was sent to your selected email.
-
Click OK.
-
Follow the instructions provided in the email to validate your domain.
Once the domain is validated, its Status will change to Validated on the Domains page.
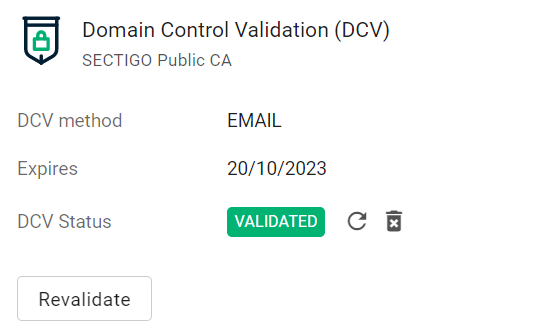
-
Obtain the SCM API credentials
-
Log in to SCM at
https://cert-manager.com/customer/<customer_uri>with the MRAO administrator credentials provided to your organization.Sectigo runs multiple instances of SCM. The main instance of SCM is accessible at
https://cert-manager.com. If your account is on a different instance, adjust the URL accordingly. -
Select . Make a note of the URL value under SSL Certificates REST API. You will need to assign it to the
scm_urlparameter in thesectigo_credentials.yamlfile.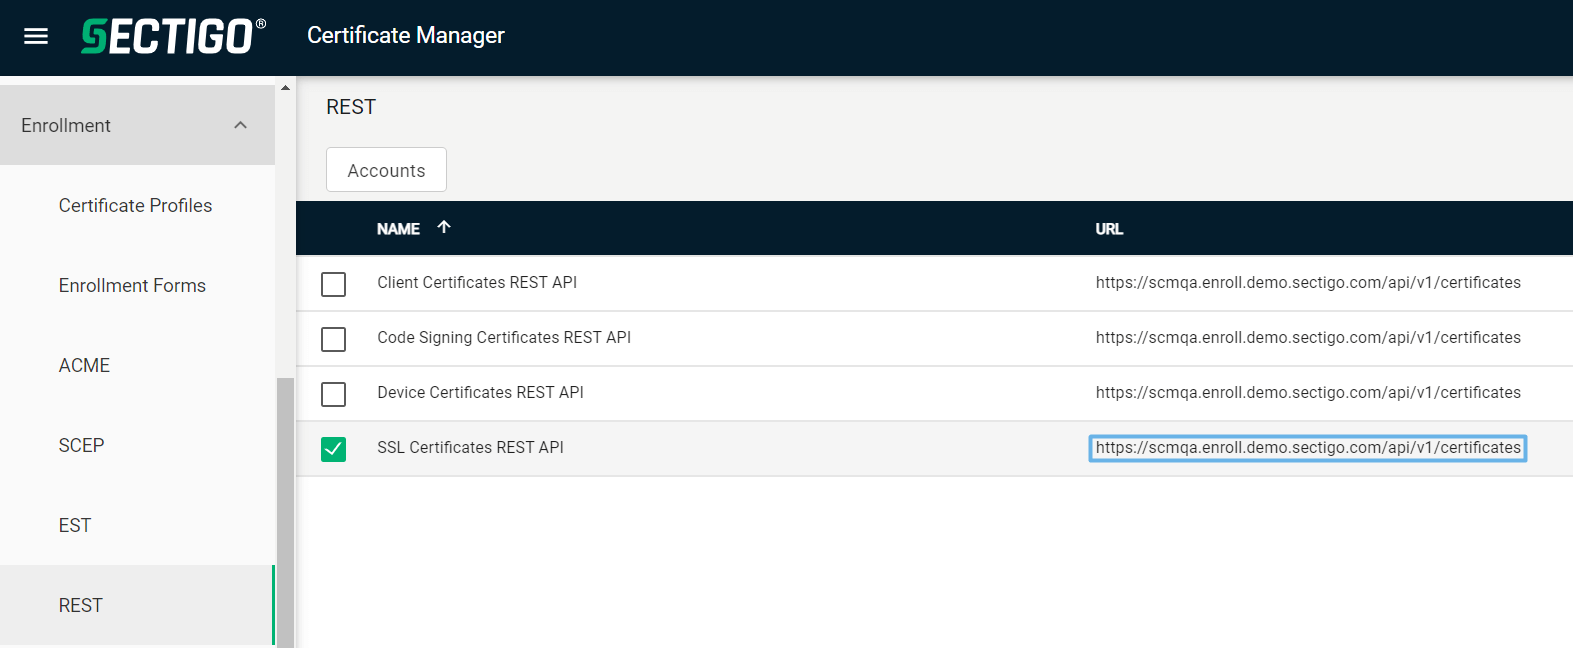
-
Select SSL Certificates REST API and click Accounts.
-
Select your account and click Edit.
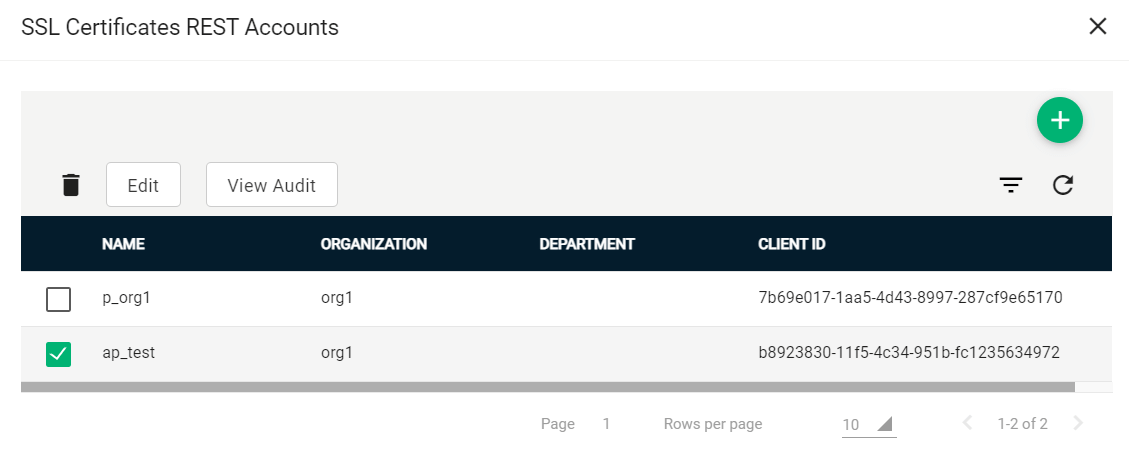
-
Click Reset Secret and confirm resetting the client secret.
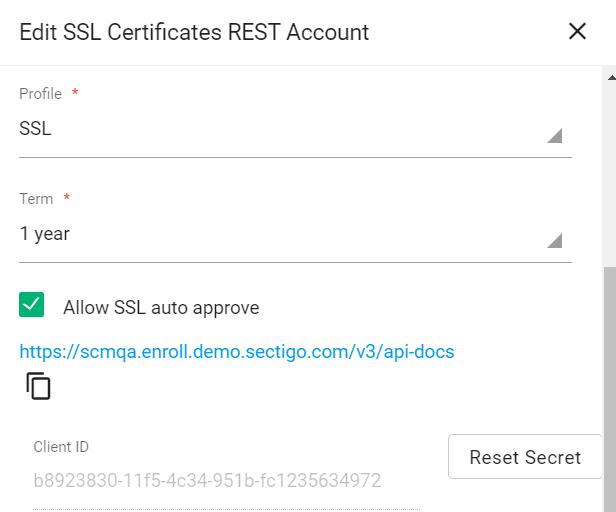
-
Make a note of the values under Client ID and Application (client) Secret. You will need to assign them to the
client_idandclient_secretparameters in thesectigo_credentials.yamlfile.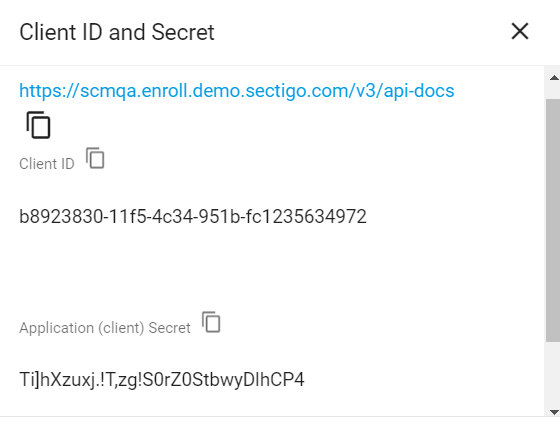
Set up the config files
The configuration files are located in the config directory.
The values can be stored in plaintext or encrypted form.
Set up the SCM credentials file
Configure the sectigo_credentials.yaml file.
SCMDV:
  scm_url: https://scmqa.enroll.demo.sectigo.com/api/v1
  client_id: "e9a4a344-eafd-471d-a9cb-496835ffcb76"
  client_secret: "VWBRVB9eC4PQnAz8p`SNqWb79j9iYpl]"
The following table describes the parameters in the file.
| Parameter | Description |
|---|---|
|
An arbitrary credentials label.
This label is referenced in the |
|
The URL of the SCM account |
|
The client ID of the SCM user |
|
The client secret of the SCM user |
Set up the Kemp profile file
Configure the kemp_profile_1.yaml file.
You can create copies of the sample file for different LoadMaster load balancers, just make sure that all filenames start with kemp_.
host: https://192.168.220.130
password: "doe123"
username: "john_doe"
The following table describes the parameters in the file.
| Parameter | Description |
|---|---|
|
The domain name or IP address of a LoadMaster instance |
|
The password of a user with API access to a LoadMaster instance |
|
The name of a user with API access to a LoadMaster instance |
Set up the config file
Configure the config.yaml file.
cert_profile_path: "config"
sectigo_sleep_download: 1
sectigo_external_requester: [email protected]
log_file: "sectigo_pycert.log"
log_path: "log_path"
log_level: debug
log_size_mb: 1
logger_count: 10
The following table describes the parameters in the file.
| Parameter | Description |
|---|---|
|
The path to the directory that hosts the certificate profile files. If you are on Windows, use a double backslash ( |
|
The time (in seconds) between an enrollment request and an attempt to download the provisioned certificate files. |
|
The email or a comma-separated list of emails of the certificate requester |
|
The name for the log file.
When the log file reaches its maximum size as specified in For example, if the log filename is |
|
The path to the directory that hosts the log files. If you are on Windows, use a double backslash ( |
|
The log level.
The supported values are The default value is |
|
The maximum size (in megabytes) of a log file.
The default value is |
|
The maximum number of log files.
The default value is |
Set up the certificate profile file
Configure the cert_profile_1.yaml file.
You can create copies of the sample file for different certificate profiles, just make sure that all filenames start with cert_.
|
Each certificate profile file provides enrollment information for one certificate.
We recommend that you keep the certificate template files outside the connector’s directory on the client machine.
Use the |
profile_name: kemp_profile_1
scm_credentials_label: SCMDV
ssl_cert_type: DV
ssl_cert_comments: Certificate for LoadMaster
ssl_cert_subject_alt_names: example.com, www.example.com
ssl_cert_custom_fields: {"Servers Public IP (or IP Subnet)":"192.168.220.130"}
csr_domain: example.com
csr_country: CA
csr_state: ON
csr_location: Ottawa
csr_organization: JohnDoe
csr_email_address: [email protected]
csr_key_type: RSA
csr_key_size: 4096
force_renewal: False
expiry_window: 30
auto_renew: True
virtualserver:
  - name: 192.168.220.130
    port: 80
    protocol: tcp
The following table describes the parameters in the file.
| Parameter | Description |
|---|---|
|
The name of the Kemp profile file |
|
The credentials label from the |
|
The type of the SSL certificate.
The supported values are |
|
(Optional) Comments for certificate enrollment |
|
A comma-separated list of subject alternative names (SAN) |
|
(Optional) Custom fields to be applied to the requested certificate.
The expected format for custom fields is the following: |
|
A single value for a domain included in the certificate Common Name (CN) field |
|
The country name included in the certificate Country (C) field |
|
The state or province name included in the certificate State (ST) field |
|
The locality name included in the certificate Location (L) field |
|
The organization name included in the certificate Organization (O) field |
|
The email address included in the certificate emailAddress field |
|
The private key algorithm to use to generate the private key.
The possible values are |
|
The size of the private key to generate.
The possible values are |
|
If |
|
The number of days prior to expiration that a certificate renewal process is initiated.
The default expiry window is |
|
If |
|
A list of virtual services to associate the SSL/TLS certificate with |
|
The IP address of the virtual service |
|
The port of the virtual service |
|
The protocol to use for communicating with the virtual service.
The possible values are |
Encrypt the config files
If you want to encrypt credentials, run the script with the -a enc option.
This action encrypts the client_secret parameter value(s) in the sectigo_credentials.yaml file and the password parameter value in the <kemp_profile_1.yaml> file(s).
If you want to encrypt an additional parameter value in a specific file, such as client_id, append _enc to the parameter name—for example, client_id_enc.
python3 main.py -a encpython3 main.py -a enc -p <kemp_profile_1.yaml> [,<sectigo_credentials.yaml>]When you run the script for the first time, it does the following:
-
Generates a private key for each file to be encrypted.
-
Stores the key(s) in the
configdirectory. -
Encrypts the values of the parameters with the key(s).
-
Adds the names of the key(s) to the
encryptedparameter of the files.
When a script reads an encrypted config file, it uses the private key specified in the encrypted parameter to decrypt the value.
host: https://192.168.220.130
password: "doe123"
username: "john_doe"host: https://192.168.220.130
password_enc: "h\xCA/\x97\N\x0F\f\xF5\xB5\x8C\t0\x88\xE2\xB0v\0\xB0\x9C3@\x02\x06\xFD\
\x86i4\xF3\xA3\xFF\xD5\x9F*\b\x97c\xDA\xF14A\xBFy\xE8\x87\x7FY\xBC\xE7\t\xF8\xE0\
\x83u\xD6\xA1\xAF\x92\xB0rS\xE6g\xA1\xAA\xC3\x95\xB8\xE9\f\xFC^\x15K:X\xCC\xD3\x9F\
\x98I\xC8\N\xA9\xF5\xD6r\xFF|\xEF\\-rP\xF6C \x1F#\xC9\x9C\x19\xB6\xEB\xB3\xE3w\v\
\x84\x8B\xDF\x81\ve\x1CH^S\xA6\x1F\x87^v\x9B\x14\eQR\f"
username: "john_doe"
encrypted: kemp_profile_1.key|
To decrypt all files, run To decrypt a specific file, run |