Configuring the connector
This page describes how to configure the connector to automate the certificate lifecycle management for Akamai.
Authenticate with Akamai
Create an .edgerc file in your home directory (~/.edgerc) with the secret, access_token, host, and client_token information for authentication through EdgeGrid.
To generate the credentials:
-
Log in to the Control Center.
-
Select your profile at top right, then select User settings on the Users tab.
-
Click Create API client, then click Quick or Advanced.
-
Copy the values to an
.edgercfile in your home directory.[default] client_secret = A113nt53KF3TM6N90yVuAgICgIRwsObLi0E67/N8eRN= host = akab-h05tnam3wl42son7nktnlnnx-kbob3i3v.luna.akamaiapis.net access_token = akab-acc35t3k3nokujqunph3w0hzp7-gtq6ij client_token = akab-c111ntt3k3n4qtari202bfxxbsl-yksej -
Add a pointer to your .edgerc file in the provider block of your
akamai.tffile.provider "akamai" { edgerc = "~/.edgerc" config_section = "default" }
For more details, see Add authentication in Akamai documentation.
Obtain the SCM API credentials
If you have not already obtained your SCM API credentials, do so now.
-
Log in to SCM at
https://cert-manager.com/customer/<customer_uri>with the MRAO administrator credentials provided to your organization.Sectigo runs multiple instances of SCM. The main instance of SCM is accessible at
https://cert-manager.com. If your account is on a different instance, adjust the URL accordingly. -
Select . Make a note of the URL value under SSL Certificates REST API. You will need to assign it to the
scm_urlparameter in thescm_config.yamlfile. -
Select SSL Certificates REST API and click Accounts.
-
Select your account and click Edit.
-
Click Reset Secret and confirm resetting the client secret.
-
Make a note of the values under Client ID and Application (client) Secret. You will need to assign them to the
client_idandclient_secretparameters in thescm_config.yamlfile.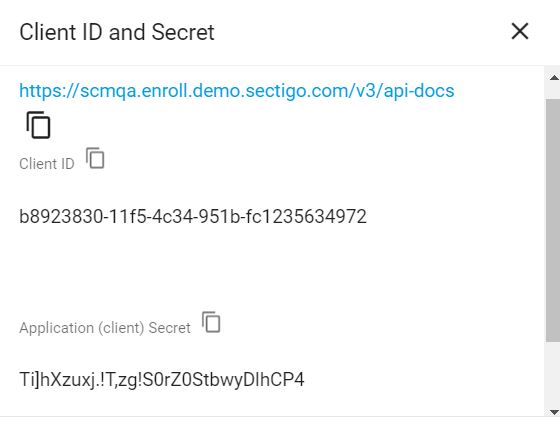
Set up the config file
Configure the scm_config.yaml file.
client_id: "e9a4a344-eafd-471d-a9cb-496835ffcb76"
client_secret: "e9a4a344-eafd-471d-a9cb-496835ffcb76"
scm_url: https://scmqa.enroll.demo.sectigo.com/api/v1
The following table describes parameters in the file.
| Parameter | Description |
|---|---|
|
The client ID of the SCM user |
|
The client secret of the SCM user |
|
The URL of the SCM account |
Configure Terraform
Configure the Terraform variables in the ./module/variables.tf file and/or example/main.tf file.
Refer to the table below.
-
If you have only one domain, you can edit the
variables.tffile and remove the./example/main.tffile. -
If you have two or more domains, create a directory for each domain and copy the
./example/main.tffile to those directories.The
./example/main.tffile contains only a handful of variables, such as the domain name or key type. It’s assumed that most certificate attributes will have the same values, which can be defined in thevariables.tffile. If you need custom values for each domain, you can add more variables to./example/main.tf, which will override the default values fromvariables.tf.
The following table describes the variables that you need to configure for certificate issuance.
Some of them will likely have values defined on a per-certificate basis (for example, SAN values), while for others you may want to define default values in the variable.tf file (for example, the contact details of the Akamai administrator).
For a full list of available variables and their values, see DV third-party enrollment.
| Variable | Description |
|---|---|
|
The Akamai contract ID |
|
The domain name included in the certificate Common Name (CN) field |
|
A comma-separated list of subject alternative names (SAN) included in the certificate subjectAltName field |
|
The certificate signing request (CSR) information
|
|
The key algorithm to use for certificate enrollment.
The possible values are |
|
The network information and TLS metadata |
|
The details of the organization |
|
The details of the Akamai administrator contact at your company |
|
The details of the certificate administrator contact at your company |
|
The number of days prior to expiration that a certificate renewal process is initiated.
|